
Why I Tried It
Over the years I have had trouble with handling full sheets of plywood. Cutting them down to size is necessary. They are too heavy and big for my table saw, as it may be tipped over. I needed a safe way to rip them down to size. I was glad to see a you tube video where the Kreg KMA2675 Kreg Rip-Cut
was being used. The Rip Cut looked like it would solve my problem. I ordered it from Amazon.
Using my plywood cutting table with a circular saw worked well. The table supports the plywood while using a cutting guide. You can use a straight edge (a straight board will work) to guide the saw while ripping. It works OK, but it takes awhile to set up for each cut. It has to be determined how far the blade is from the edge of the “shoe” that the straight edge will rub against. Add this to the dimension that has to be cut. If it is two inches from the blade to the edge of the saws shoe, and you want to cut a 24″ strip, the straight edge has to be clamped down at 26 inches. Don’t forget about the 1/8th inch the saw blade kerf takes up too.
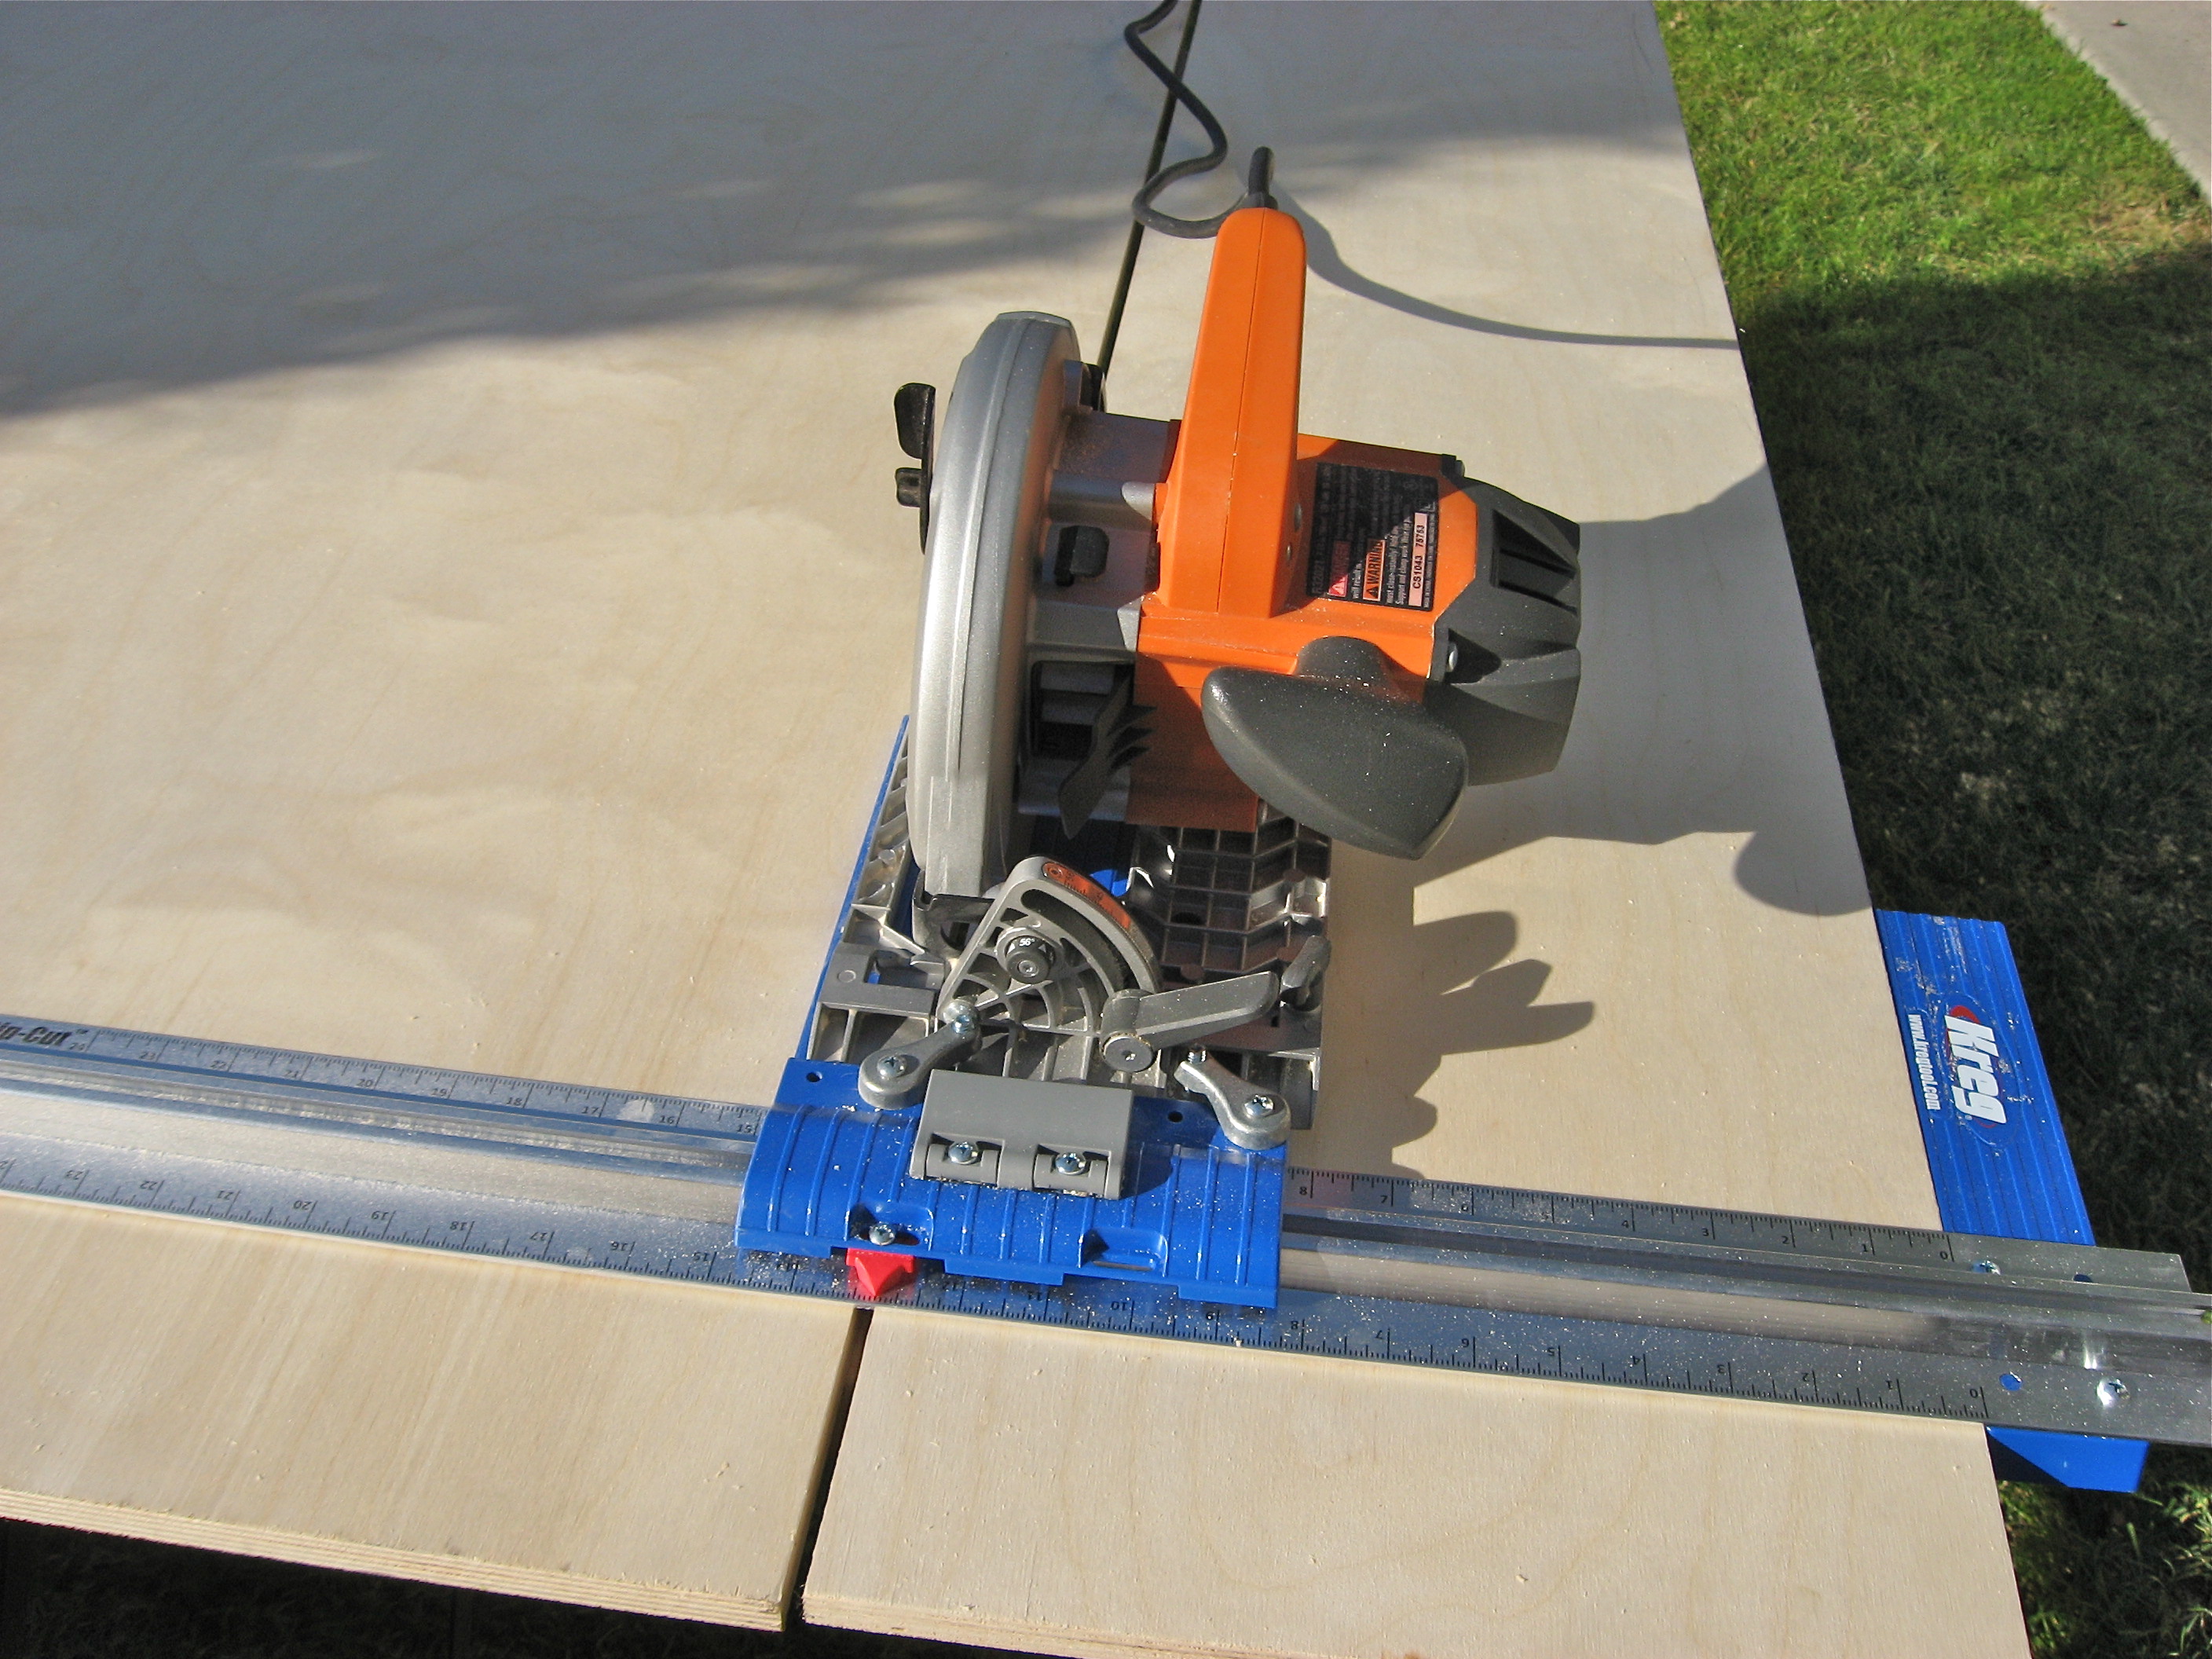
Using the Kregg Rip-Cut
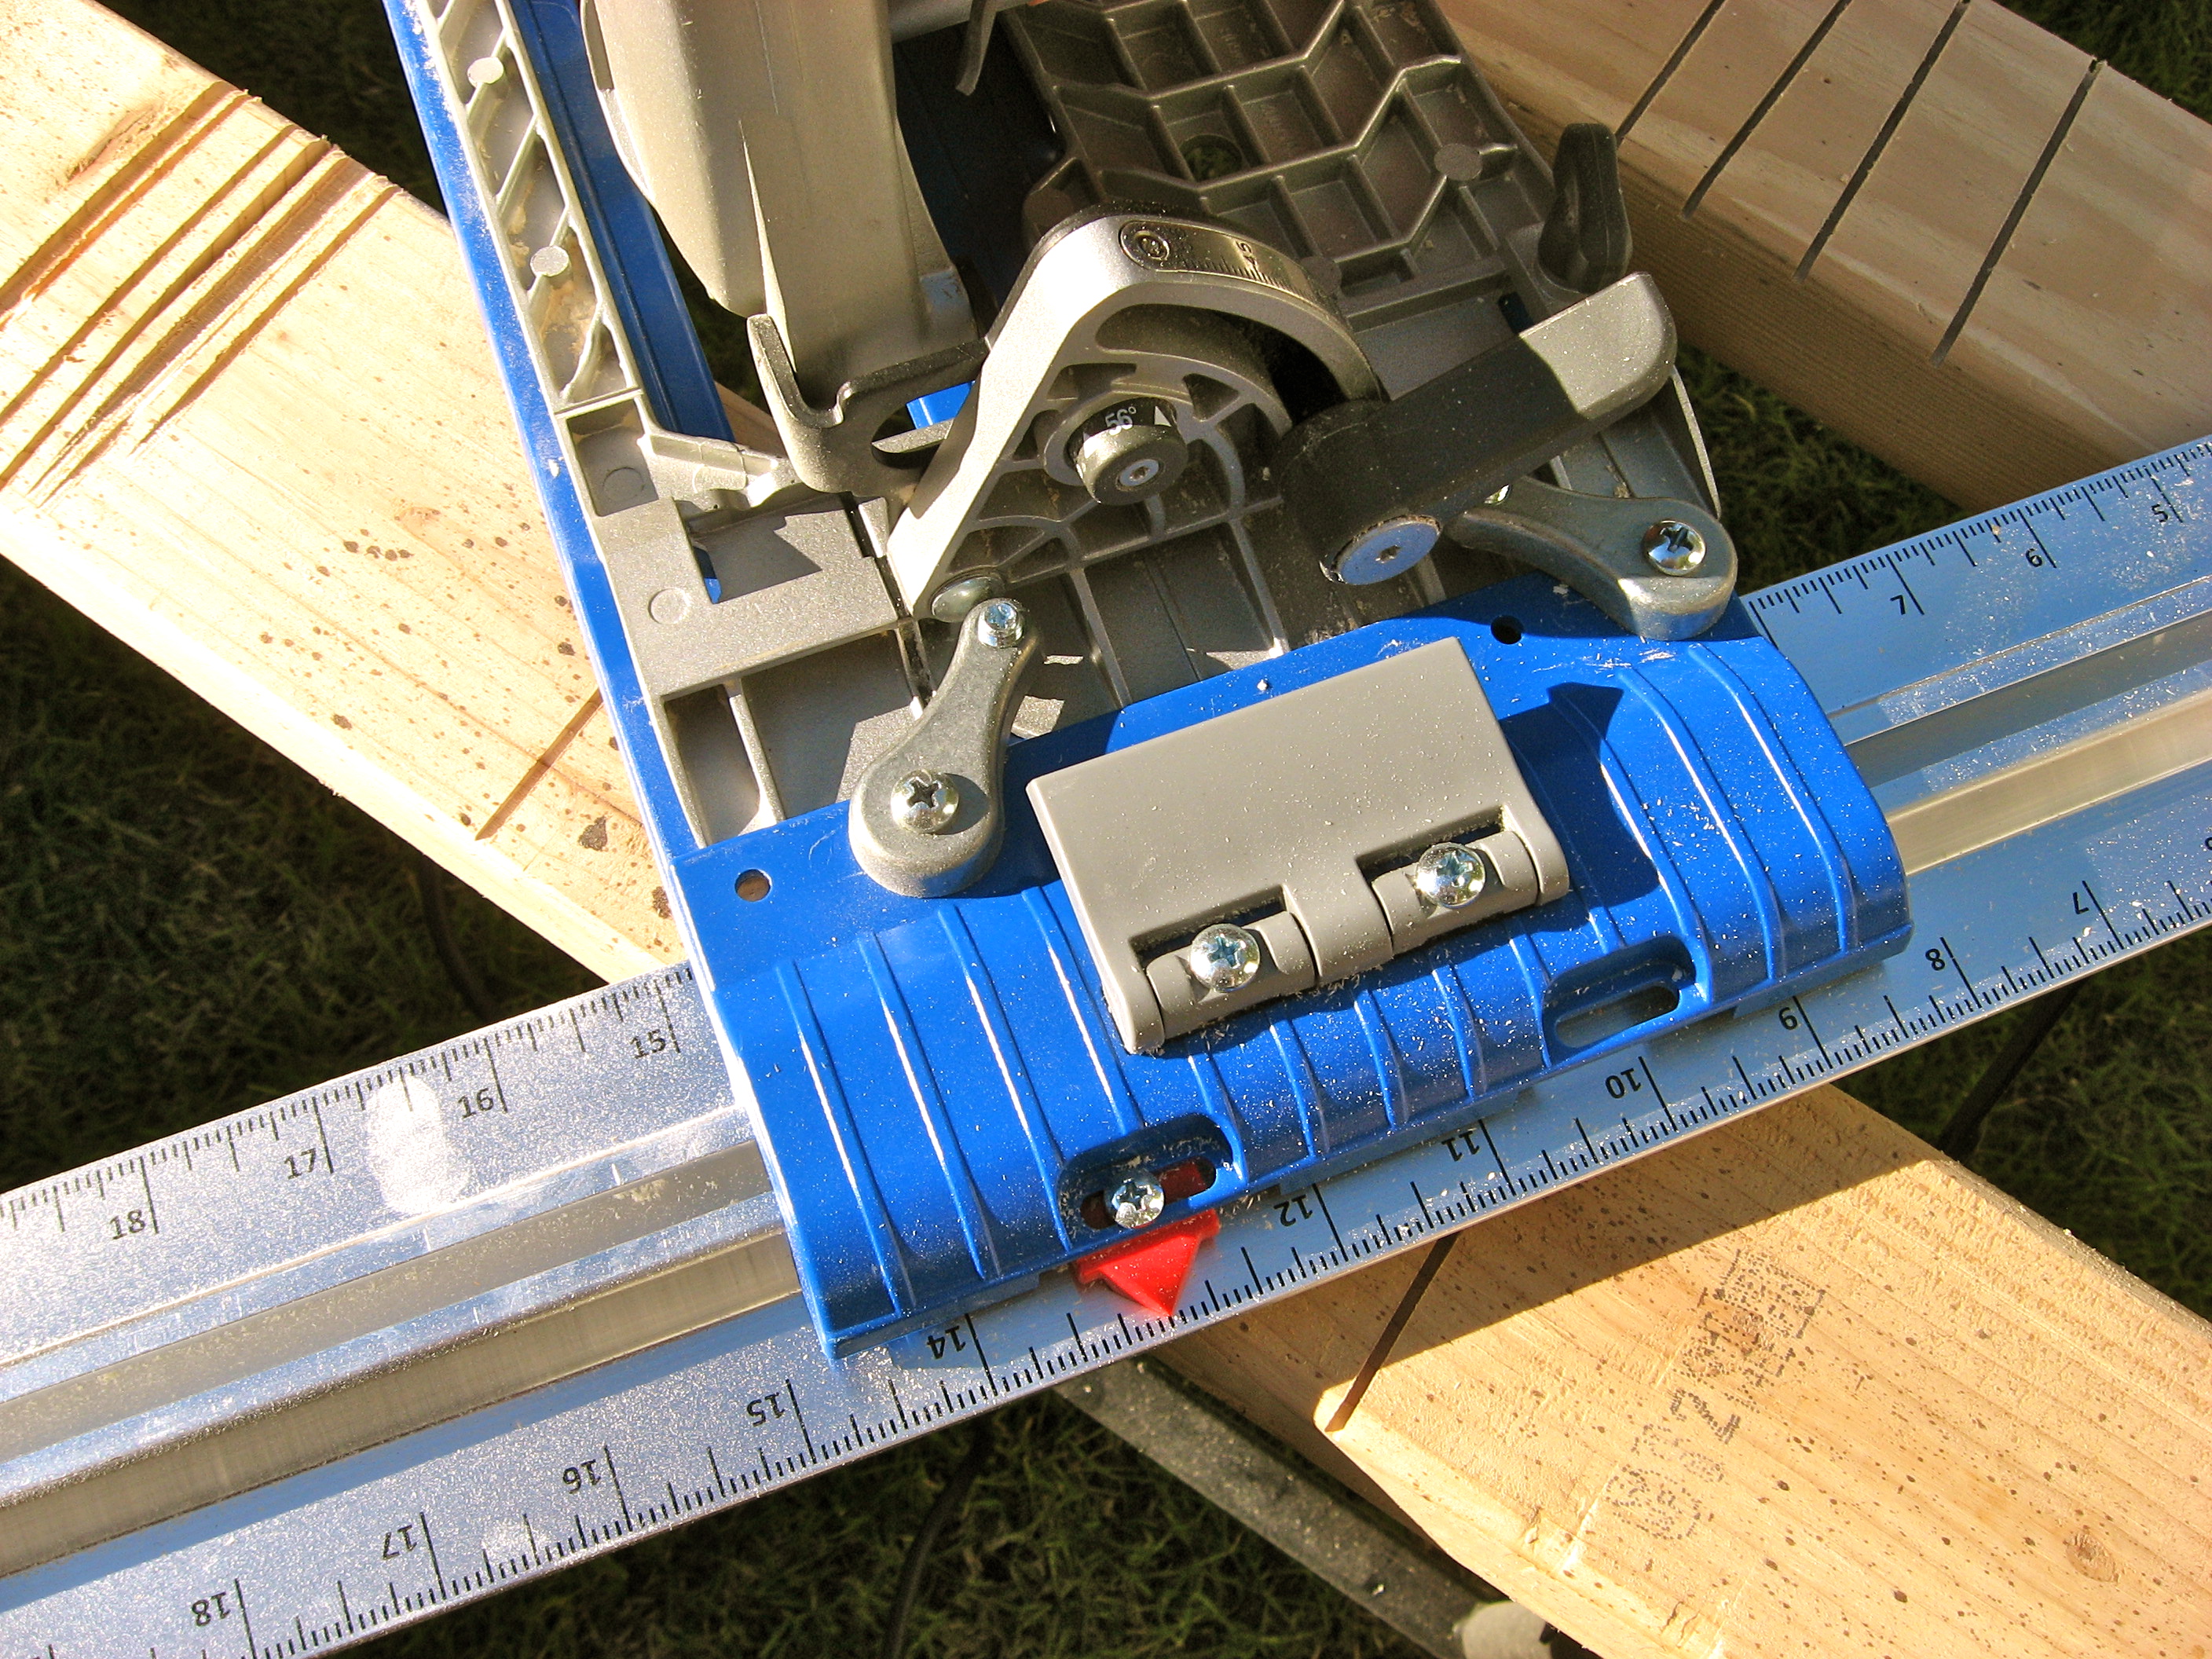
Using the Rip-Cut, all this is done automatically. It can rip up to 24 inches. It clamps to your circular saw using two clamps. After it is assembled the first time, it can be removed and reattached quickly. I would re-zero the pointer each time though. This is easily done by sliding the Rip Cut’s edge guide up against the saw blade and adjusting the measuring pointer to zero. Be advised that you do have to assemble the Rip Cut and adjust it to your model of saw the first time. Just snug down the clamps. They have pointed tips to grab on to the saws plate. It can be adjusted for right or left handers.To adjust the cutting width, just pull up on the grey lever and slide to the desired measurement. Push the lever down to lock.
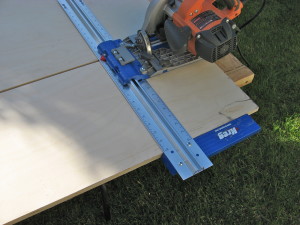
Place the edge guide against the panel you wish to cut. Start the saw and cut keeping the edge guide firmly against the edge. I hold and push the saw with my right hand, while pushing the guided against the edge with my left. I have the plywood slightly over hanging the table so it doesn’t interfere with the edge guide. The guide is a little thicker than 1/2 inch.
It works best for long rips. For shorter cuts it doesn’t work well, as the guide edge is not long enough. Kreg does sell a tool for crosscuts, but I do not have it. I use a cross-cut sled on my table saw. You can make a cross-cut guide easily. If I see a good plan I will post it.
My Conclusion
I am quite happy with my purchase of the Rip-Cut. It allows me to quickly cut down plywood to a workable size. The only complaint I have- I wish the cutting guide was a bit longer. As you get to the end of a cut, the guide stops supporting the cut before the blade is all the way through. I have to learn to “follow through” with the cut. It hasn’t been a problem. I do my finish cuts on a table saw . If you don’t have a table saw, you could use this with a cross-cut guide to make shelves and simple cabinets.
If you are interested, please use my Amazon link to look at the Kreg KMA2675 Kreg Rip-Cut. It doesn’t cost you anything and helps pay for my web-hosting.