Review Ryobi P882 Drill and Impact Driver Kit

Ryobi P882

This is a review of the Ryobi P882 Drill and Impact Driver Kit. I got it at Home Depot. It is a 18 Volt Lithium Ion setup. My previous cordless drill was a 12 volt nicad Hitachi which always seemed slow to me. There is a substantial increase in power with the new drill. I like the Lithium power-pack because the speed of the drill does not decrease as the power pack gets drained and they hold a charge a long time when stored. At first I did not like the color, but it is growing on me. It comes with a soft case, rapid charger and two battery packs. You can get larger battery packs, but I find the ones supplied last long enough for my use. The included charger rapidly recharges them in under an hour. Ryobi Lithium Drill P882


Ryobi P271Ryobi P271 top

The drill is a 2 speed range 0-440 rpm and 0-1600 rpm, 1/2″ chuck, 24 clutch settings. The chuck locks and has a long nose so it is easy to tighten and loosen. Has a level, storage for a driver bit, magnetic tray on the base to hold loose screws. I like the weight and how it fits my hand. It has enough power to drill large holes through oak.

Ryobi Impact Driver P234GImpact driver is variable speed, has locking chuck for  standard  1/4″ hex bits. It also comes with a 3/8 inch socket adapter for driving lag bolts, etc.. It acts like a regular variable speed drill until it meets resistance. Then it switches over to impact mode, giving it more torque. It really snugs fasteners down. Works great on lag bolts and fasteners.

This kit is a great addition to the tool collection of the  DIYer. I sold my 2 year old nicad drill when I got this one as it was such an improvement I didn’t want to be bothered with the old technology. Especially the nicads rapid draining when stored. Hope this review helps.

My youtube video of the un-boxing is here.

Air Conditioner Problems Before Calling a Repairman

You turn on the thermostat for your Central Air Conditioner. Instead of cool air, you get warm air coming from the vents. You go outside to see if the fan on the compressor is running. It is not. Before you call the repairman, there is something you can try, to fix the A/C yourself. DIY Air Conditioner repair. This happened to me recently. Of course it was a really hot day and I had nothing to loose.

First off, I am not an electrician or A/C technician. The circuits are high voltage and if you do something stupid like work on equipment with the power on , and the voltage goes through your heart, stopping it, you could die! Do not attempt if you have any doubts.Breaker Panel

You are going to check the fuses. Before that, check that the circuit breaker at the main panel is not tripped for the A/C. Reset it if it is. Central Air is usually the second largest breaker in the panel. In this case it is a 50 amp breaker in a 100 amp panel. Then try turning on the A/C at the thermostat. If it works, great you are done. If it keeps on tripping the breaker, call a repairman. If the breaker is fine, check the fuses next to the compressor. (Turn off the circuit breaker first!) Here is the fuse box next to mine. This setup is safe to work on, as the whole fuse-block pulls straight out. Yours may be different. Mark which side is up to make it easy to re-insert correctly.

IMG_1496IMG_1497IMG_1499


Flipping it over you see the fuses in the block. This is a 220 Volt circuit so there are two. Fuses can go bad over time, because of heating and cooling. Like a light bulb. To test the fuses I am using volt/ohm meter. Any do-it yourself handy person should have one of these. This is a $5 one from Harbor Freight. They sell them at Walmart too. In this case I am using it to check continuity.

Testing fuseIMG_1508


Using the 200 ohm scale (the scale with the omega symbol) I clip the leads to each end of one fuse. Do not hold in place with your fingers, you will get a false reading! This fuse is reading 3.4 ohms resistance. So this fuse is OK. Current can flow through it. Checking the next one the meter reads a “1” all the way to the left. This means the fuse is blown. No current can flow through it. If this is the case for you. You have found the culprit. Replace the fuse with the same  type. Pry out the blown fuse out of the clip and take it  to the store and match it. In this case it is a slow blow fuse. They cost more than the regular ones, but that is what is needed.

IMG_1500


After you insert the new one, put the block back into the box, close the lid, turn back on the breaker and see if the A/C works. If it does hooray! If not, or it works for awhile and blows the fuse again, or the fuses tested okay- call a repairman.

Another thing it can be is the contactor or relay inside the unit. I have had ants crawl in there and foul it up. But, that is more involved than I can get into on this blog. There may be a video on you tube if you want to tackle it.

How to Clean a Dryer Vent Easily

Rotary LintEater Kit RLE202


This is how I clean a dryer vent quickly and easily. When they designed this house, the dryer was a long way from the outside wall, so they put a 10 foot plastic pipe in the concrete foundation. It has been a headache from the start. Lint collects on the walls of the pipe and has been impossible to clean effectively. Even worse there are two 90 degree bends. The best I could do was scrape the sides with an 8 foot long stick and blow the lint out with an electric leaf blower. Happily I found a solution on Amazon that really works. A Gardus RLE202 LintEater Rotary Dryer Vent Cleaning System. Not a catchy name for sure, but I love it. Here is a link to it on Amazon. It is an affiliate link but costs you nothing. Gardus RLE202 LintEater 10-Piece Rotary Dryer Vent Cleaning System

I dreaded trying to clean the vent, but when it takes forever for my clothes to dry and you know they are wearing themselves out – something had to be done.

IMG_1484IMG_1477IMG_1478


The LintEater comes with an 2 brushes, a cutter tip for rain gutter use, 4- 3′ flexible rods and 2 adaptors to fit to a standard 4″ dryer vent.  I used the adaptor to hook my shop vac to the dryer vent while brushing it out. A clean way to do it. No dust in my face. If you don’t have a shop vac, you could turn on the dryer to air dry and clean from the outside. A dryer doesn’t blow very hard though. You can see from the pictures the rods are very flexible and when screwed together reach 12 feet. You do need to attach the rods to a power drill to spin the brush. This gives it the great cleaning action. The instructions suggest you wrap some tape around the area where the rods are screwed together. This is to prevent them from unscrewing if you accidentally switch the drill into reverse.

IMG_1475IMG_1473Cleaning Dryer Vent


In the pictures above you can see the brush fed through the dryer vent plug, then it is inserted into the vent. This vent was cleaned several months ago so the buildup is not bad. Not like when I first did it!

IMG_1481IMG_1480IMG_1482


I attached my shop vac to the vent and then fed the cleaner, attached to my drill,  into the vent. Since I vent wasn’t too dirty, I did all twelve feet at one time . Feed it in slowly, with a back and forth motion to scrub the vent. The first time I did it, I added one three foot section at a time. Making sure that each section of the vent was clean before adding on another rod. When the vent is caked with lint, it causes friction on the brush. The rods are flexible and want to whip. Adding one rod at a time reduces this.

The brush is short so can get around elbows. This is where it really shines for me. At the far end close to the dryer there are 2 elbows. This traps lint. When the cleaner hits that area, I can really hear the lint being sucked into the vacuum. You can see the collected lint in the picture above

After years of my dryer vent being half-way clogged, it is clean. This product makes it easy. Now I clean it whenever I feel the dryer is taking too long to dry clothes. This saves wear and tear on my clothes and energy. As you can tell I am real happy with this product.
Gardus RLE202 LintEater 10-Piece Rotary Dryer Vent Cleaning System


Bathtub Caulking the Best Way

I find this is the best way to caulk a bathtub. No one likes to re-caulk a bathtub, but it is a necessary evil. If it isn’t done- it looks terrible. Even worse, water will get behind the tile and damage the wood underneath. The best way is to remove the old, mildewed and loose caulk. By removing the old caulk and replacing with new, you will have a long lasting repair. If you just go over the old, the mildew will just transfer to the new and there will not be a good bond.

Caulk Removal Tools

Caulk Removal Tools

The goal is to have an elastic seal between the tub and the wall. When the tub is filled with water, it actually moves down slightly from the wall. Each gallon of water weighs eight pounds plus a person- it adds up. That is why the caulk has to flex or it will crack. As in painting, preparation is the key. You have to remove as much as possible of the old caulk. Here are the tools I use. Feel free to improvise. I use the razor blade to scrape and cut, the screwdriver and pick to get under and lift, the long nose pliers to pull strips of caulk off. It is great when you can work loose a section of old caulk and it comes off in a long strand. Unfortunately, that seldom happens for me.

Here is a tool I find useful. It is an oscillating multifunction tool. You can get them cheap at

Oscillating Multifunction Tool

Oscillating Multifunction Tool

Harbor Freight or Amazon. Genesis GMT15A Multi-Purpose Oscillating Tool
They sell them cheap, because they get you on the attachments. The saw blade I use comes with the tool. A simple steel saw. You don’t need carbide, because we are not removing hard grout. I use a thin steel sheet to protect the tubs porcelain if I slip. When using any of the tools, take care not to scratch the tub or wall. You have to be very careful if you have a fiberglass tub or wall.

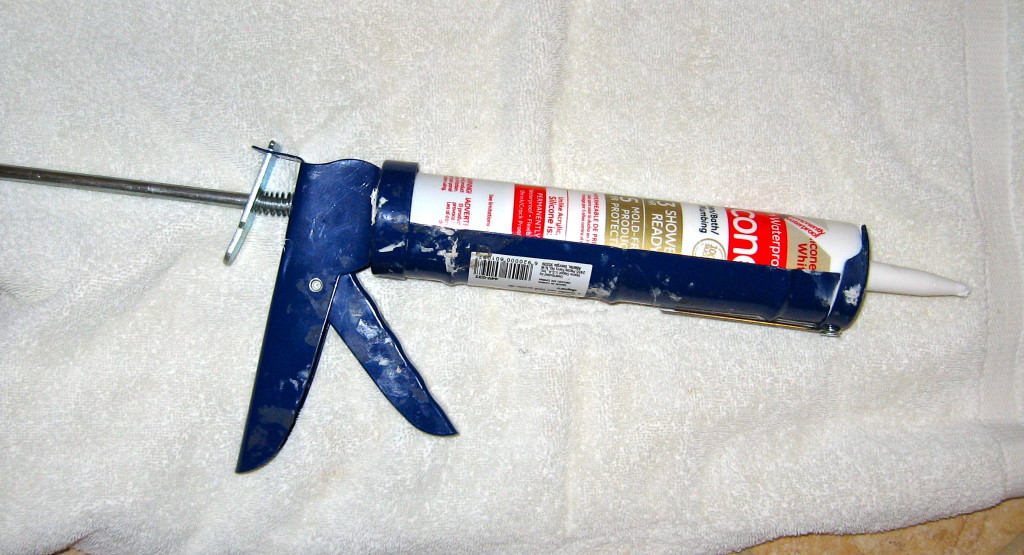
After you have removed all the old caulk, use a vacuum to get all the loose bits. Here are Bathtub caulk removedthe two grouts that are most popular at Home Depot. I have been having a tough time with the Kwik Seal mildewing after a year (really annoying). I have started using the GE white silicone for better mildew resistance. You can also get it in a big tube to use with a caulking gun.

Bathtub Caulks

Caulks

Before applying the caulk, have a bunch of paper towels handy and a small bowl with soapy water in it. Apply a bead of caulk. The thickness of the bead takes practice. Too little and you won’t fill the gap. Too much and you will have a lot to clean up. So do a little section first. Take your finger, dip it in the soapy water, and smooth the bead of caulk down so it blends into the wall and the tub with a dished look. Remove excess caulk with your finger. You want a nice seal. Wipe the excess off of your finger with the paper towels. Do another section. You can blend one section into another with your finger. Keep on going. Dipping your finger in the soapy water keeps the caulk from sticking to your finger, giving a smooth finish. Once you are done, stand back and look at the difference it makes! Follow the directions on the caulk for drying times.

Applying Caulk Bead

Caulk Bead (Click to Enlarge)

Smoothing Bathtub Caulk Bead

Smooth (Click to Enlarge)


Bathtub Caulking Finished

All Done!