Selling Tools On Craigslist

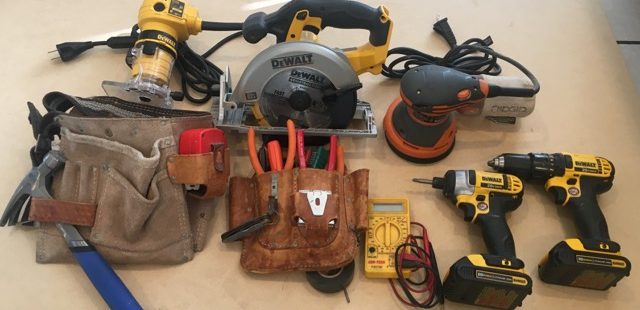
Selling tools on Craigslist is a great way to make money to buy better tools and reduce clutter. I have always loved tools and have many different kinds, from metal to woodworking. Over the years I have sold many thousands of dollars worth of old tools. These are tools I didn’t need anymore due to upgrades, did not use or didn’t like. This frees up space for something better.

In the olden days, before the internet, I used  Pennysaver or The Recycler. These have been replaced by Craigslist. Craigslist is free to use and all you need to set up an account is an email address. Your email address is not seen by anyone else, so you do not get spam by using it. You can set up ads directly on www.craigslist.com or if you have a smartphone, you can use an application on it. I like CPlus for Craigslist. There is an advantage to using a phone. You can write your ad and take a picture with your phone at the same time. Pictures are very important. They grab the attention of a potential buyer getting them to look at your ad. If place and ad from your computer, you will have to get a picture onto it. You can email it to yourself or export it from the program used to look at pictures.

I have used Facebook Selling groups and and www.nextdoor.com but these groups do not cover as wide of an area as Craigslist. Some of the tools I sell are specialized, so I need to cast a wide net.

Coming up with a price is hard. I usually do a search on Craigslist to see what others are selling similar items for. You can even go on www.ebay.com to come up with a price. I usually shoot a little high and lower the price over time. You can renew the ad as often as you want. Never think about what you paid for a tool. No one cares, but you. The only thing that matters is what someone will pay for it now.

I have had it take more than a month to sell some things.  Popular items for a good price can sell the same day. The right person has to come along and find your ad.  Beware the person that gets back to you fast with a lowball price. These are often resellers and I just ignore them. When someone says they are interested and want to look, tell them to call when they are leaving and ask when will they arrive. I hate waiting around for no-shows. Have change on hand. Say you are selling an item for $50, some guys play the game of “I only have twentys, will you take $40” Have a ten in hand. Don’t take it personal, it is just a game.

If you live in a big city, there are often more than one area to post in. I live on the border of two areas. Posting in one area and then the other gives me a bigger audience.  If I just want to get rid of something I post under For Sale- Free. Freebies can often be gone in hours. I gave away a broken string trimmer recently. The guy that got it repaired them. I know a guy that  sells wood he has left over after making bowls as firewood. He sells a trash can full for $15.

In 40 years of selling stuff through classifieds, I have not had a bad experience and have met interesting people. I just sold a fertilizer spreader to a guy who lives 100 yards from me on the next street over. He has lived there 20 years and I didn’t know him. Now I do.

So sell some tools and make room for something new.
Drill Press Center Pulley Bearing Replacement

Drill Press Center Pulley Bearing Replacement

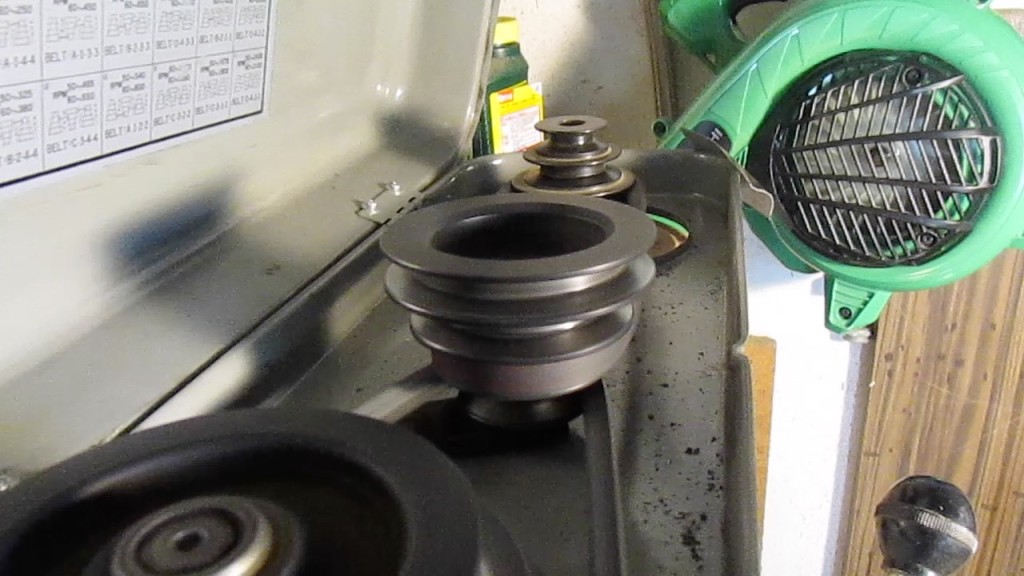
Drill Press Center Pulley Bearing Replacement – I posted a video on youtube.com showing how I did this on a 30 year old Orbit Drill Press. I imagine it is the same on other drills with a center pulley. It can be done without special tools and the bearings can usually be bought on amazon.com for cheap. I did not see information online on how to do this, so I did it and made a video in the process.

I bought a 30 year old Orbit Drill Press for a good price, but being so old it has some issues, like the bearings wearing out. The center pulley bearings were making noise. I do have a link in the video description to a great video on changing spindle bearings. I will do this next.

Get Woodworking Ideas on the Internet

Get woodworking ideas on the internet. I did a demonstration at the Woodworkers of Whittier meeting, showing the usefulness of the internet for the woodworker. It is a great research tool for finding out information. I covered three ways to use it:

Get Ideas, Learn Techniques and Get Information on ToolsToy wood tugboat

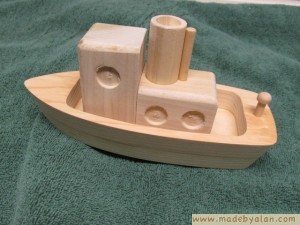
Google is the best known way to find information on the internet. What many people don’t know, is that when you do a search, it will also do an image search. Recently I wanted ideas for a toy tugboat. By doing a Google search I got pictures of toy tugboats. Click on the picture and you can get more information . Another popular way to see pictures of woodworking projects, is to go to www.pinterest.com . This is a site where people put together collection of pictures they like from the internet. This is called “pinning”. These collections have themes. One collection I have is “Things I want to make”. You can see other peoples collections and search them.

www.youtube.com is an excellent place to learn woodworking techniques and get ideas. There are probably a million videos there. Some are great and some lousy. Here are a few of the people I follow. Steve Ramsey (does wood projects weekly, John Heisz, Mathias Wandel, The Wood Whisperer, April Wilkerson and Izzy Swan. Most of these people also have associated websites where they post plans. I find if I need a jig for my workshop, doing a search on Youtube finds me someone who has already made one.

The woodworking magazines have websites and Facebook pages where they post free tips, plans and videos. Wood Magazine is a good one. Woodworkers Guild of America often posts free short videos.

Before buying a tool, do a google search for reviews. It will lead you to websites with information on that tool. Also go to www.amazon.com and look up a tool. Even if you don’t buy it there, looking at the reviews is most helpful.

If you have and old tool without an owners manual, do a google search with the make and model number. You can often find a site that has a free manual in pdf format that you can download for free. Craftsman is really good about this.

So, use the internet to help in your woodworking endeavors.

Makita 2012NB Planer Blade Change

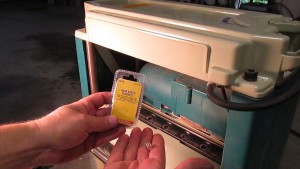
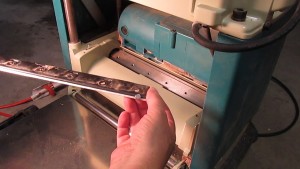
Makita 2012NB Planer Blade Change- How to change or flip the blades on a Makita 2012NB Planer using rare earth magnets to hold the blade. I bought this planer used and did not have the tools or manual for replacing the blades (knives). Makita gives you a magnetic blade holder, but I did not have that. Turns out it is easy using small rare earth magnets from Harbor Freight  to hold the blades in place and install them.

Here is a good deal on blades for almost half the price of Makita  on Amazon Powertec Blades. Watch my youtube video above to see how I did it. The blades are 2 sided  so often you can just flip them.

Makita 2012NB Magnet Blade Change
Makita 2012NB Blade Change using magnet

Hitachi RB24EAP Leaf Blower Repair

Hitachi RB24EAP Leaf Blower

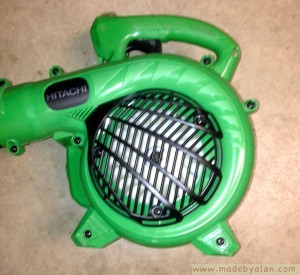
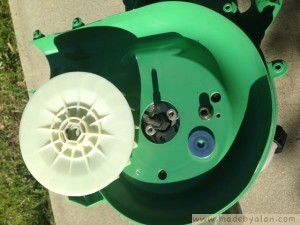
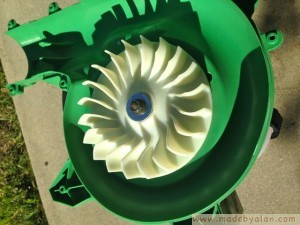
Hitachi RB24EAP Leaf Blower repair for loose impeller. I have had this leaf blower for 6 months, using it once a week with no problems. I like that it is rather quite, starts easy and works well. The other day when I was starting it as usual, it kicked back on me. It backfires and whips the starter cord out of your hand. It has never done this before. My old leaf blower did it all the time. It started on the next try and I used it on the yard as normal. Half way through I could hear something plastic rattling. I finished, turned it off and shook it. The impeller was loose hitting the housing. I got out the drill driver and took out the 8 screws that held the housing on.Hitachi RB24EAP Leaf Blower repair

The nut holding the impeller on was loose. I took it all the way off, fearing that the plastic impeller was damaged. Turning it over I saw it was undamaged. Putting it back together I put  Permatex 24200 Medium Strength Threadlocker Blue, 6 ml
on the bolt threads hoping to prevent it from happening again. I don’t know why they didn’t do it at the factory. Holding the impeller I tightened the nut snug. Anyway the repair only took 5 minutes. I think what happened is when it backfired, going in reverse, it loosened the nut. Even though it needed tightening, I would still buy this tool again. Starts easy and does the job quickly.

Hitachi RB24EAP Leaf Blower repair

Review Hitachi RB24EAP Leaf Blower

Hitachi RB24EAP Blower

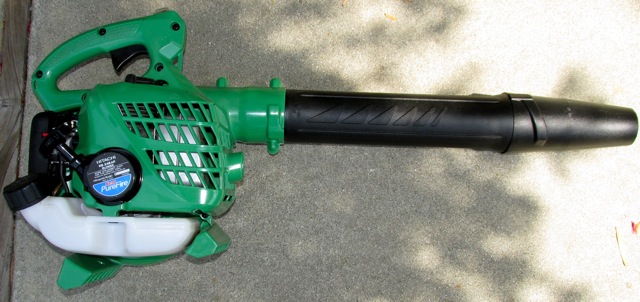
This is a review of the Hitachi RB24EAP Leaf Blower. I bought it six months ago and now feel I have enough time using it to give my views. I bought it off Amazon Hitachi RB24EAP 23.9cc 2 Stroke 170 MPH Gas Powered Handheld Blower (CARB Compliant)
and received it promptly. I read the reviews and knowing Hitachi to make good products I took the chance. I am happy I did. (NOTE: I did have to do a simple repair on this unit after 6 months. See it here). Update: I have now owned 1.5 years and it is still running great. It gets used once a week, 52 times a year as we do not get winter in Southern California.

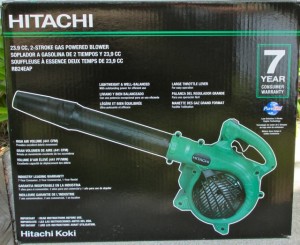
Un-boxing it I noticed it was nicely made. With high quality looks and nice plastics used. It came boxed in 3 pieces. It was a very tight fit attaching the blower tube to the main body. I thought it was defective, but it was just tight. Putting the blower on its back and forcing the tube on worked. The nozzle attached easily. There is only one. A fan one would be a nice addition.

Hitachi RB24EAP Leaf Blower Box

After filling the gas tank part way with premix (it does not come with premix oil), I put the choke on and attempted to start it. I say attempted, because it would not start. With “Damn I am going to have to send it back” going through my head, I did some trouble shooting. In the end- I could see the intake hose for the fuel had shifted in transit and wasn’t sitting at the low point in the gas tank. It wasn’t getting fuel. Using a pencil I pushed it down to where it needed to be. this time it started after several pulls. It is an easy pull starter cord and doesn’t kick back like my old blower.

After starting I noticed it was quite at idle. Even after increasing the speed it is not that loud. It puts out a large amount of air. I am just using it to clean off walkways and driveways around the home. I can get most of it done just at idle speed. Revving it up increases the amount of air moved, not necessarily the velocity. I don’t know how good it would be on wet heavy leaves. I will find out soon enough. It works good for my needs.

Some of the cons- It is a bit heavy (8.5 pounds), bulky and gets tiring. But the work goes quickly. I use it on a quarter acre yard. If I had more, I would get a backpack blower. The choke and stop switch are reversed to what I am used to. The choke is on when it is down. Pushing up on the rocker switch turns it off. Turn the choke on to start and when it does back it off quickly as the engine will sputter until you do.

These cons are more annoyances. The pros are-It does start easily. When it is warm, it starts real easy with a quick tug. It is quite, well made. it even has a keeper for the gas cap. I can cleanup the yard quickly. That is what I bought it for and I would buy it again.

Review Ryobi P882 Drill and Impact Driver Kit

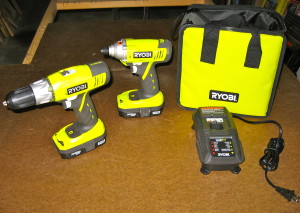
Ryobi P882

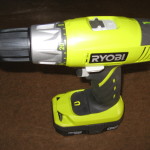
This is a review of the Ryobi P882 Drill and Impact Driver Kit. I got it at Home Depot. It is a 18 Volt Lithium Ion setup. My previous cordless drill was a 12 volt nicad Hitachi which always seemed slow to me. There is a substantial increase in power with the new drill. I like the Lithium power-pack because the speed of the drill does not decrease as the power pack gets drained and they hold a charge a long time when stored. At first I did not like the color, but it is growing on me. It comes with a soft case, rapid charger and two battery packs. You can get larger battery packs, but I find the ones supplied last long enough for my use. The included charger rapidly recharges them in under an hour. Ryobi Lithium Drill P882


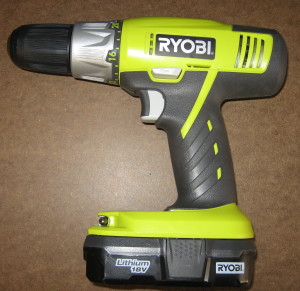
Ryobi P271Ryobi P271 top

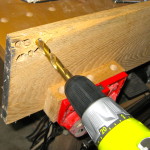
The drill is a 2 speed range 0-440 rpm and 0-1600 rpm, 1/2″ chuck, 24 clutch settings. The chuck locks and has a long nose so it is easy to tighten and loosen. Has a level, storage for a driver bit, magnetic tray on the base to hold loose screws. I like the weight and how it fits my hand. It has enough power to drill large holes through oak.

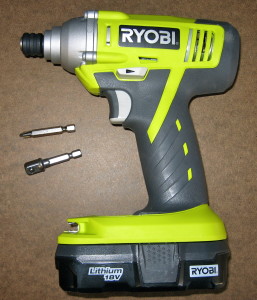
Ryobi Impact Driver P234GImpact driver is variable speed, has locking chuck for  standard  1/4″ hex bits. It also comes with a 3/8 inch socket adapter for driving lag bolts, etc.. It acts like a regular variable speed drill until it meets resistance. Then it switches over to impact mode, giving it more torque. It really snugs fasteners down. Works great on lag bolts and fasteners.

This kit is a great addition to the tool collection of the  DIYer. I sold my 2 year old nicad drill when I got this one as it was such an improvement I didn’t want to be bothered with the old technology. Especially the nicads rapid draining when stored. Hope this review helps.

My youtube video of the un-boxing is here.