How to Clean a Dryer Vent Easily

Rotary LintEater Kit RLE202


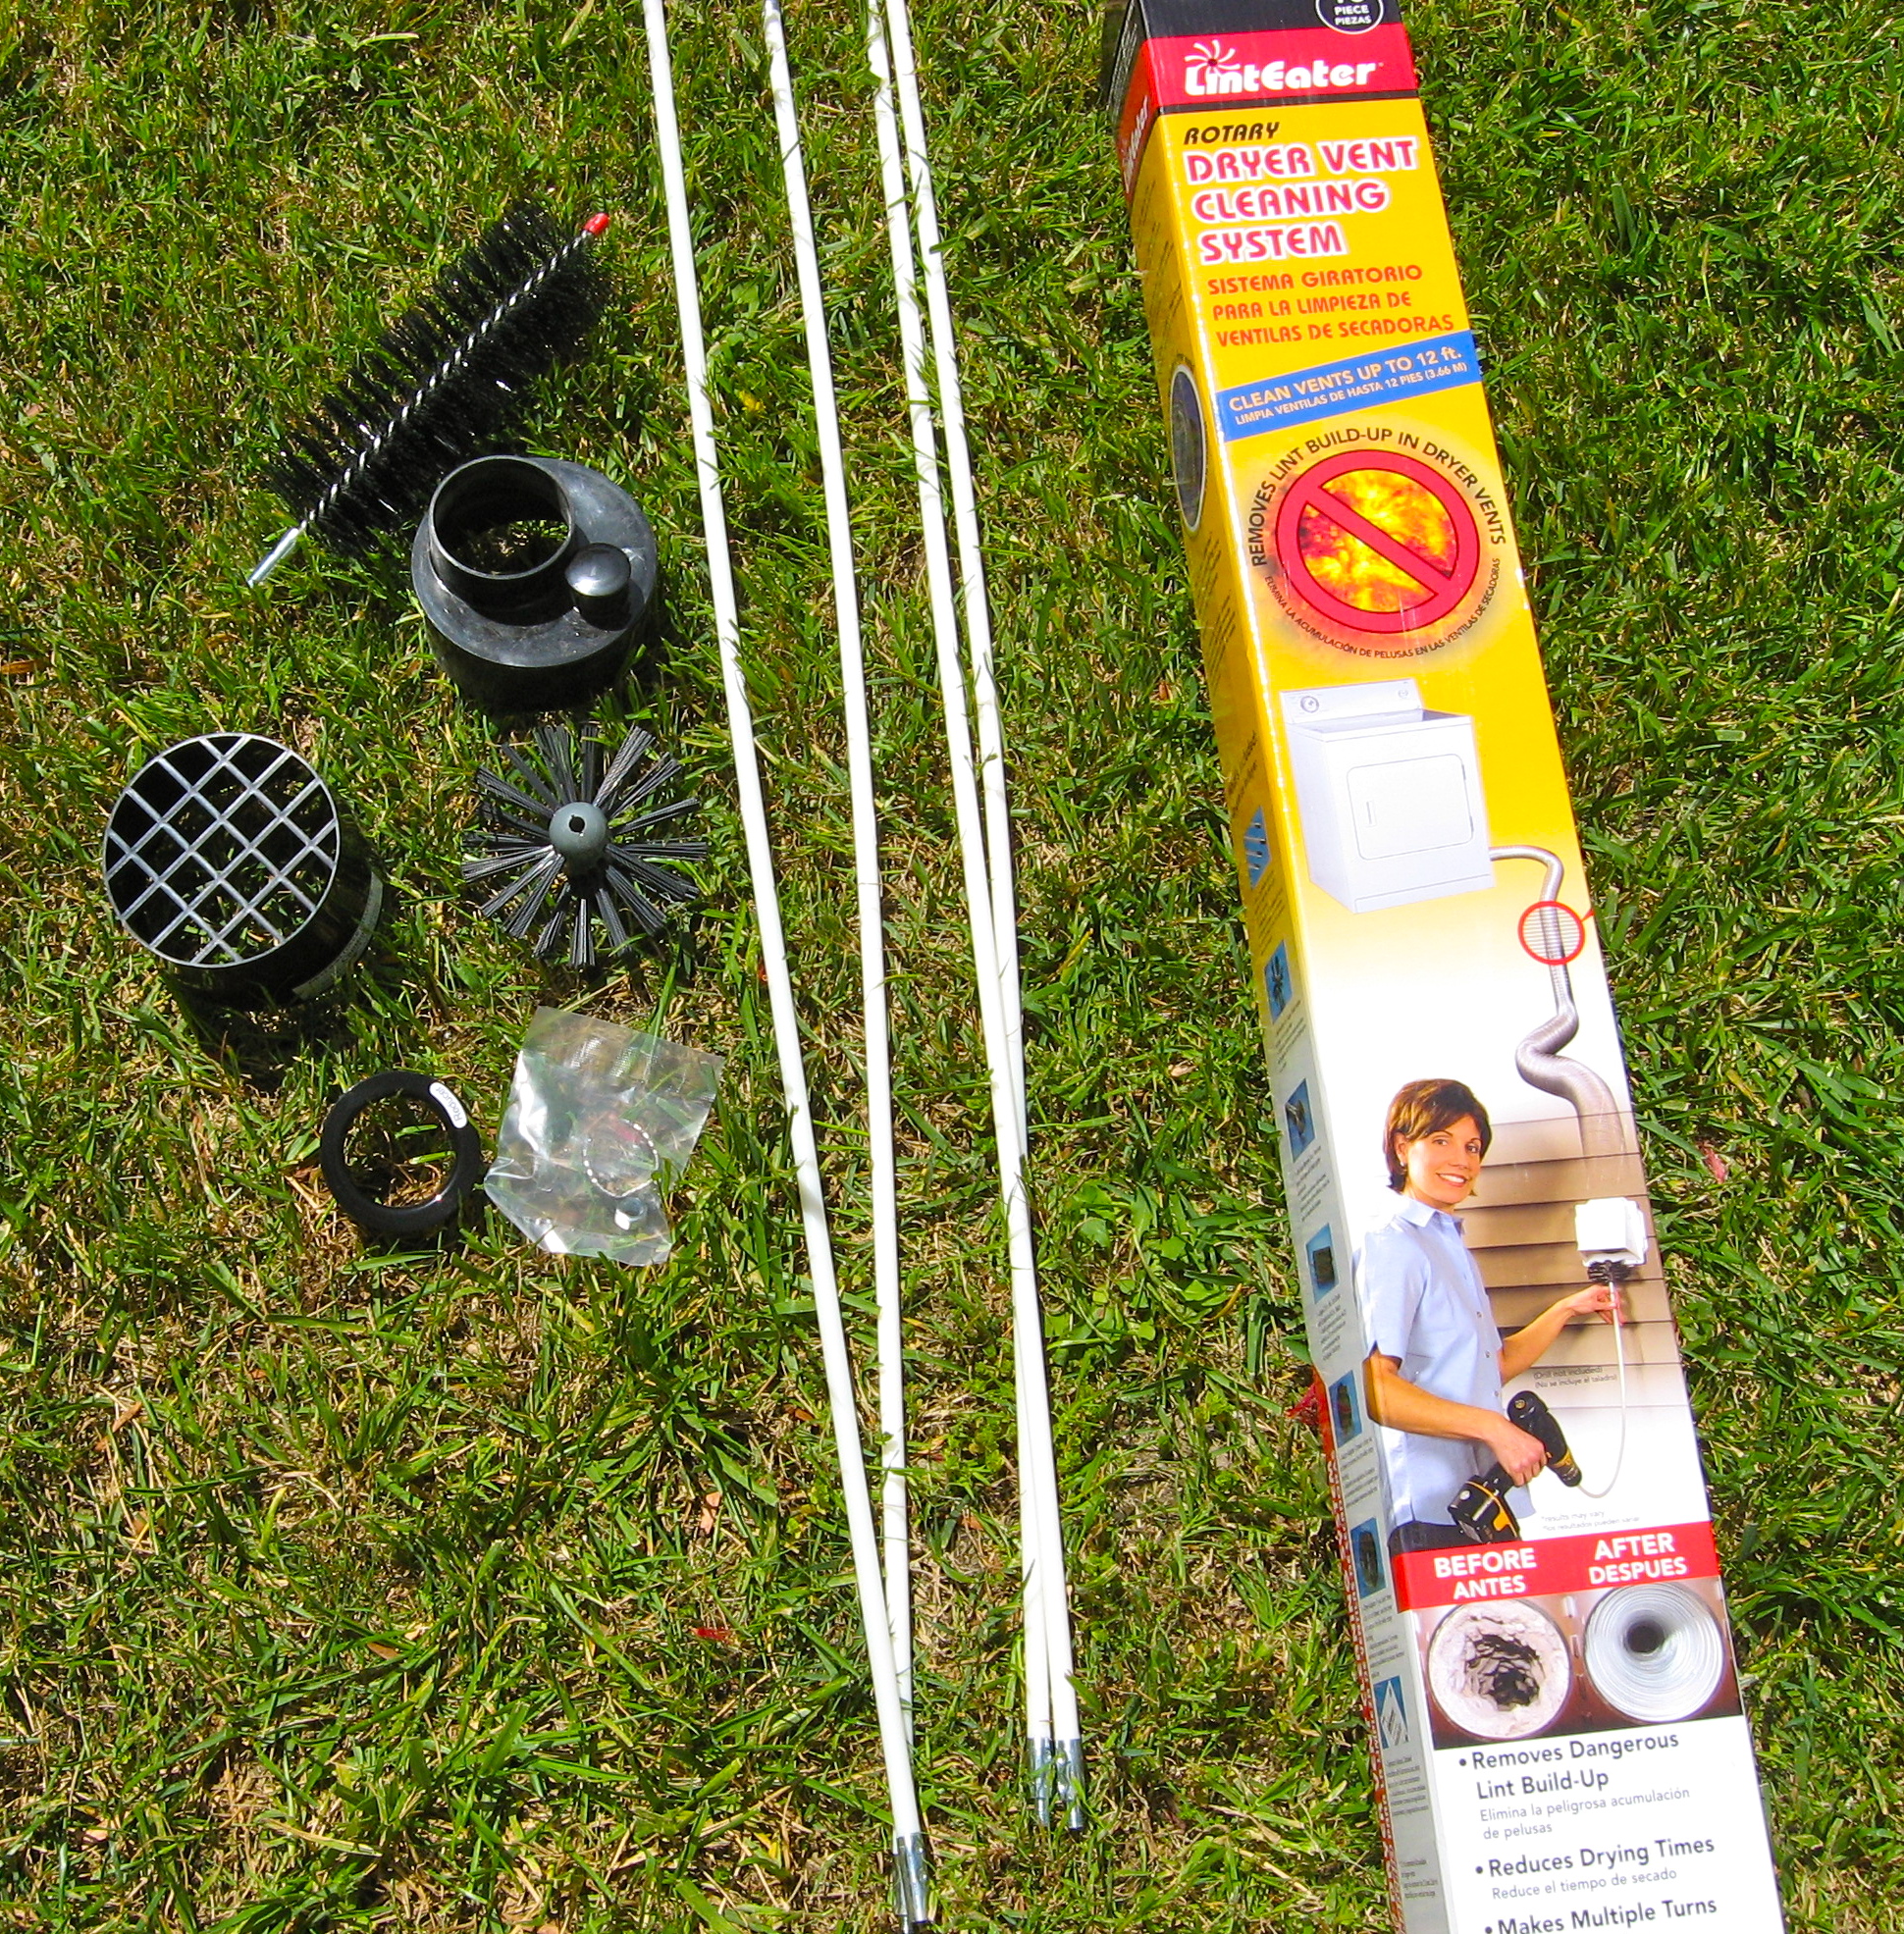
This is how I clean a dryer vent quickly and easily. When they designed this house, the dryer was a long way from the outside wall, so they put a 10 foot plastic pipe in the concrete foundation. It has been a headache from the start. Lint collects on the walls of the pipe and has been impossible to clean effectively. Even worse there are two 90 degree bends. The best I could do was scrape the sides with an 8 foot long stick and blow the lint out with an electric leaf blower. Happily I found a solution on Amazon that really works. A Gardus RLE202 LintEater Rotary Dryer Vent Cleaning System. Not a catchy name for sure, but I love it. Here is a link to it on Amazon. It is an affiliate link but costs you nothing. Gardus RLE202 LintEater 10-Piece Rotary Dryer Vent Cleaning System

I dreaded trying to clean the vent, but when it takes forever for my clothes to dry and you know they are wearing themselves out – something had to be done.

IMG_1484IMG_1477IMG_1478


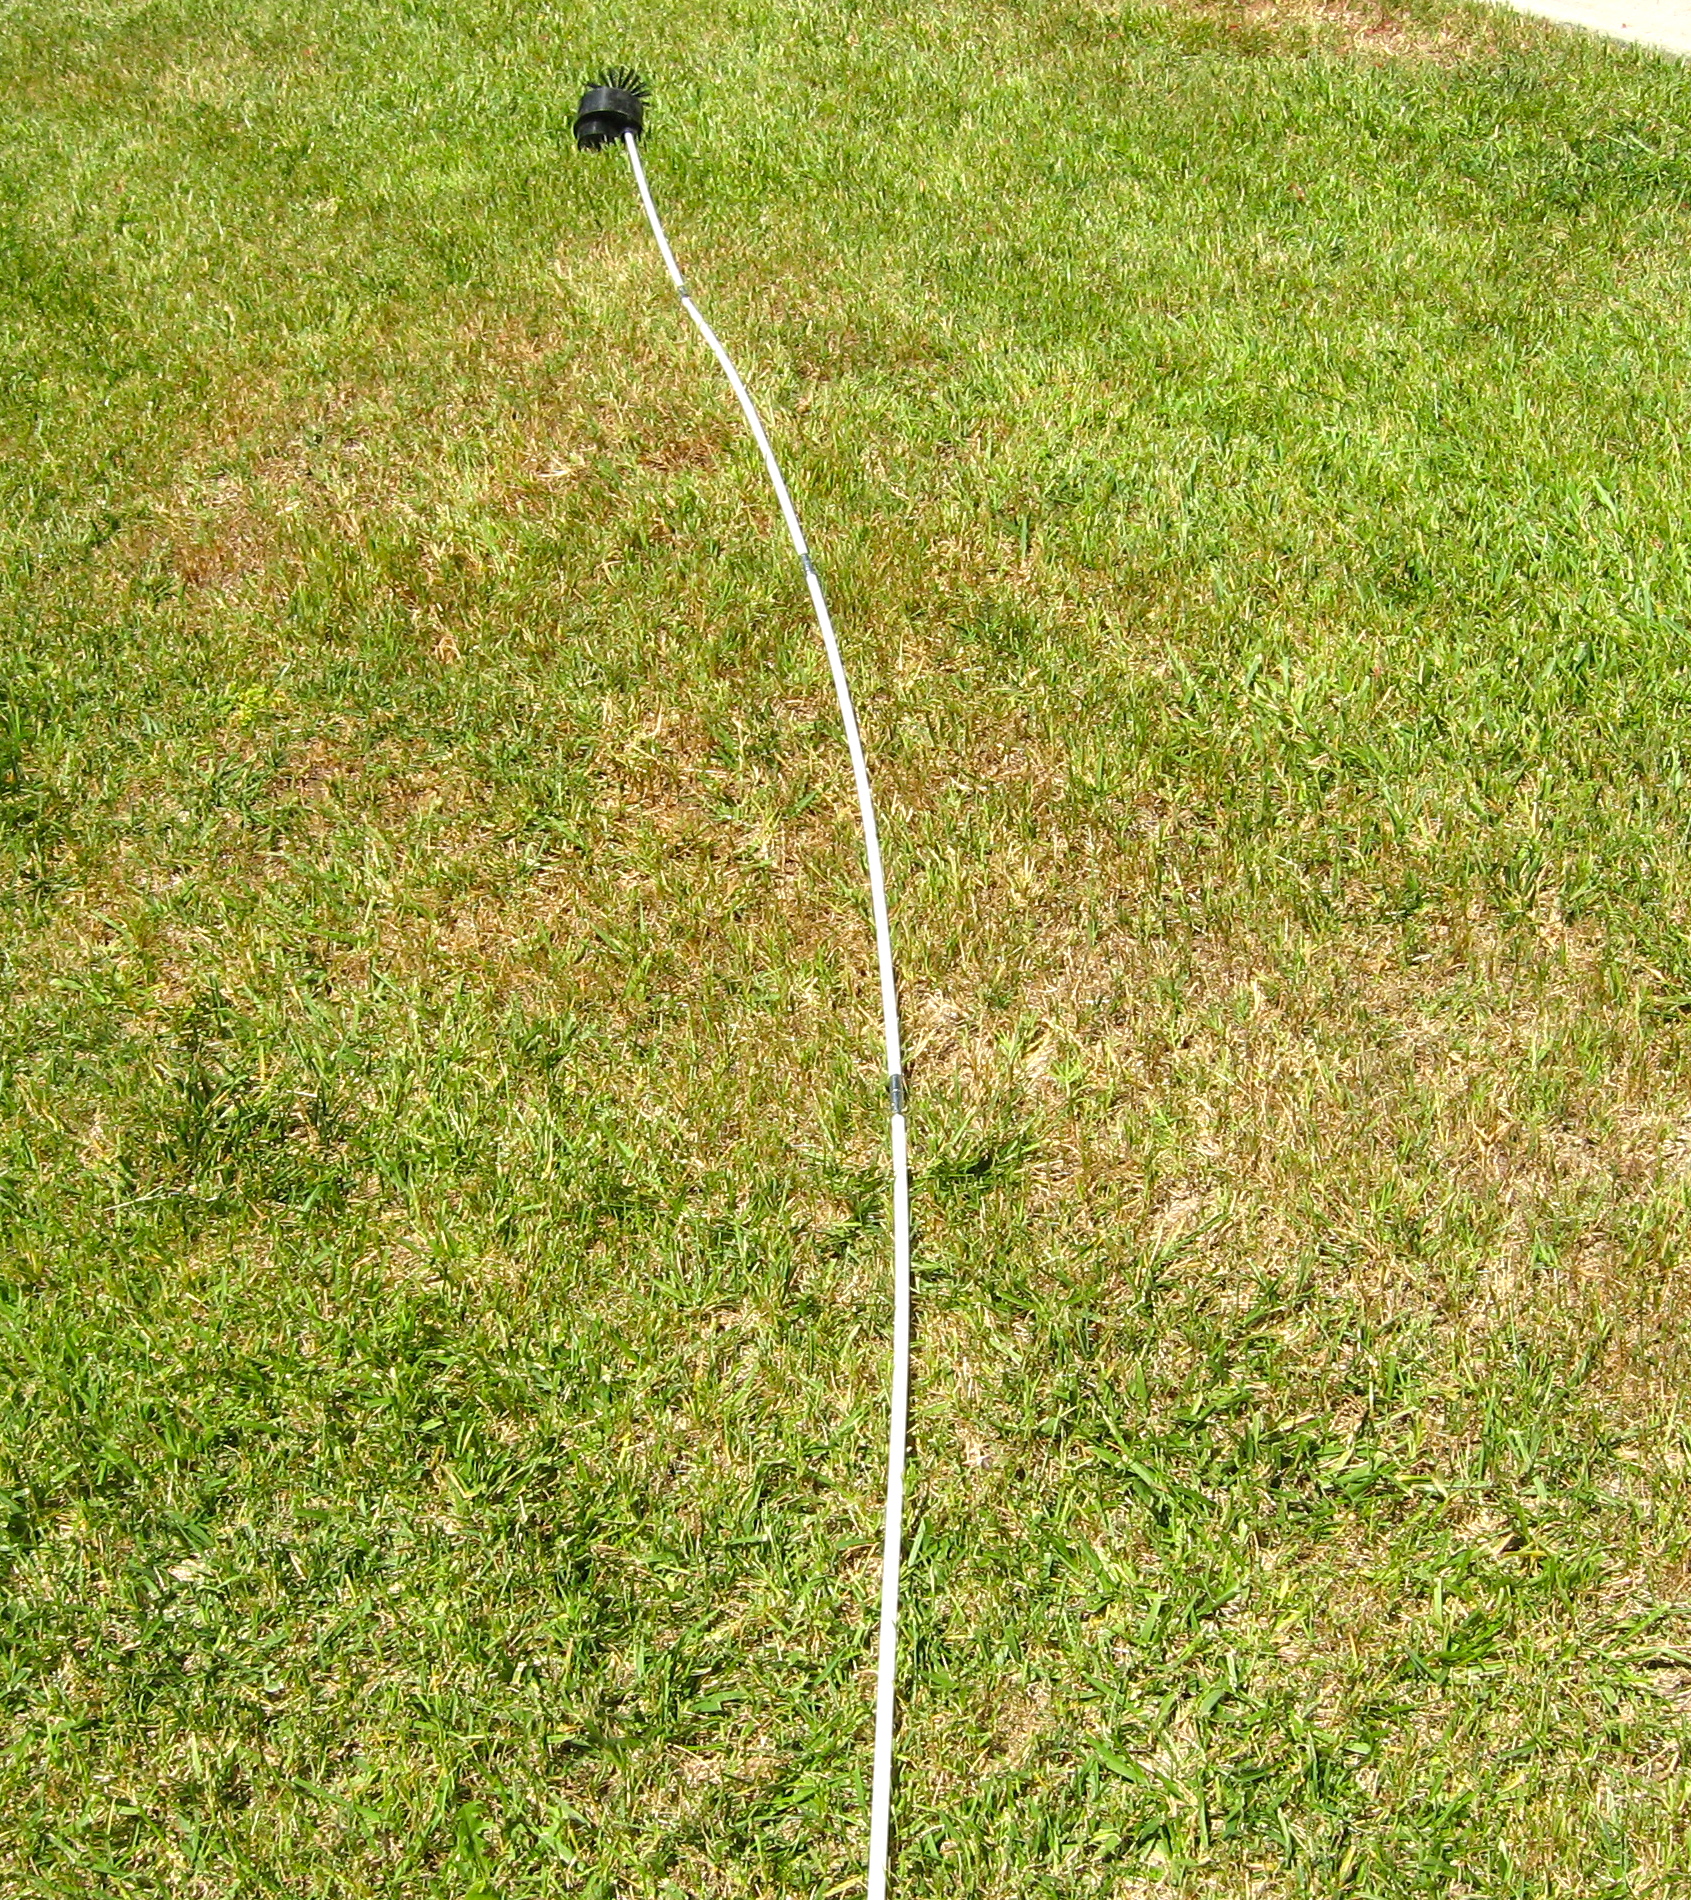
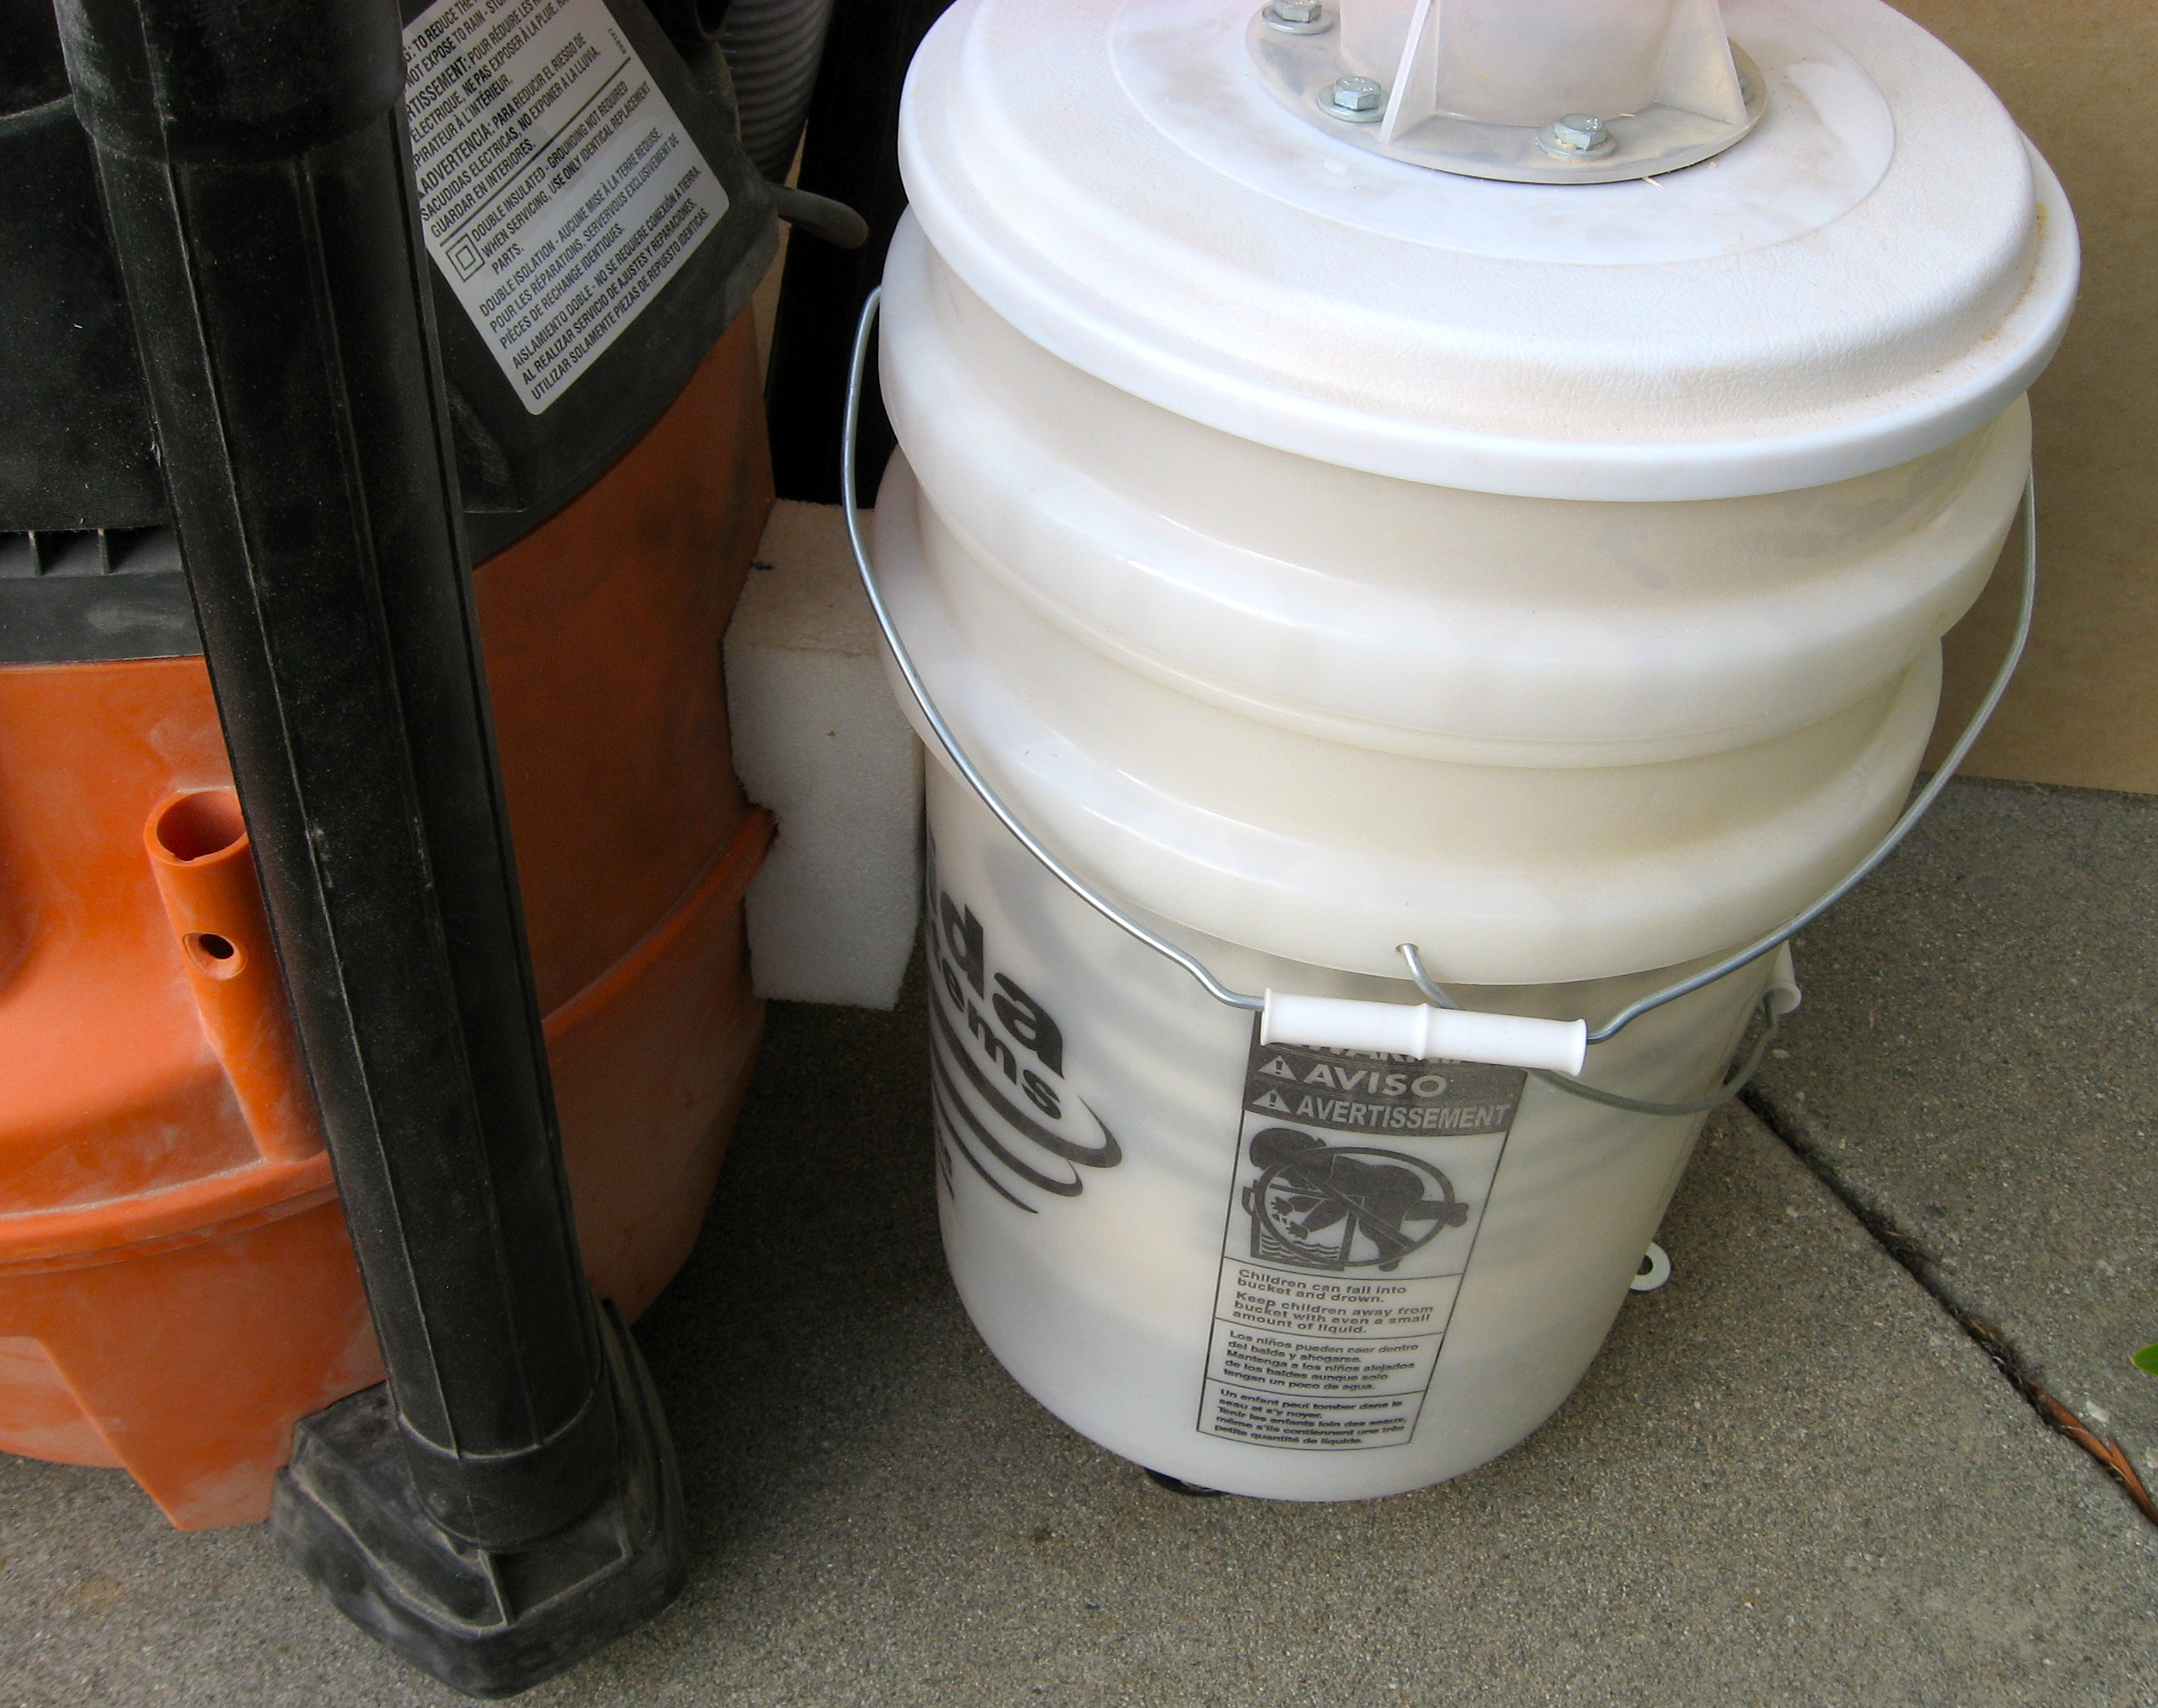
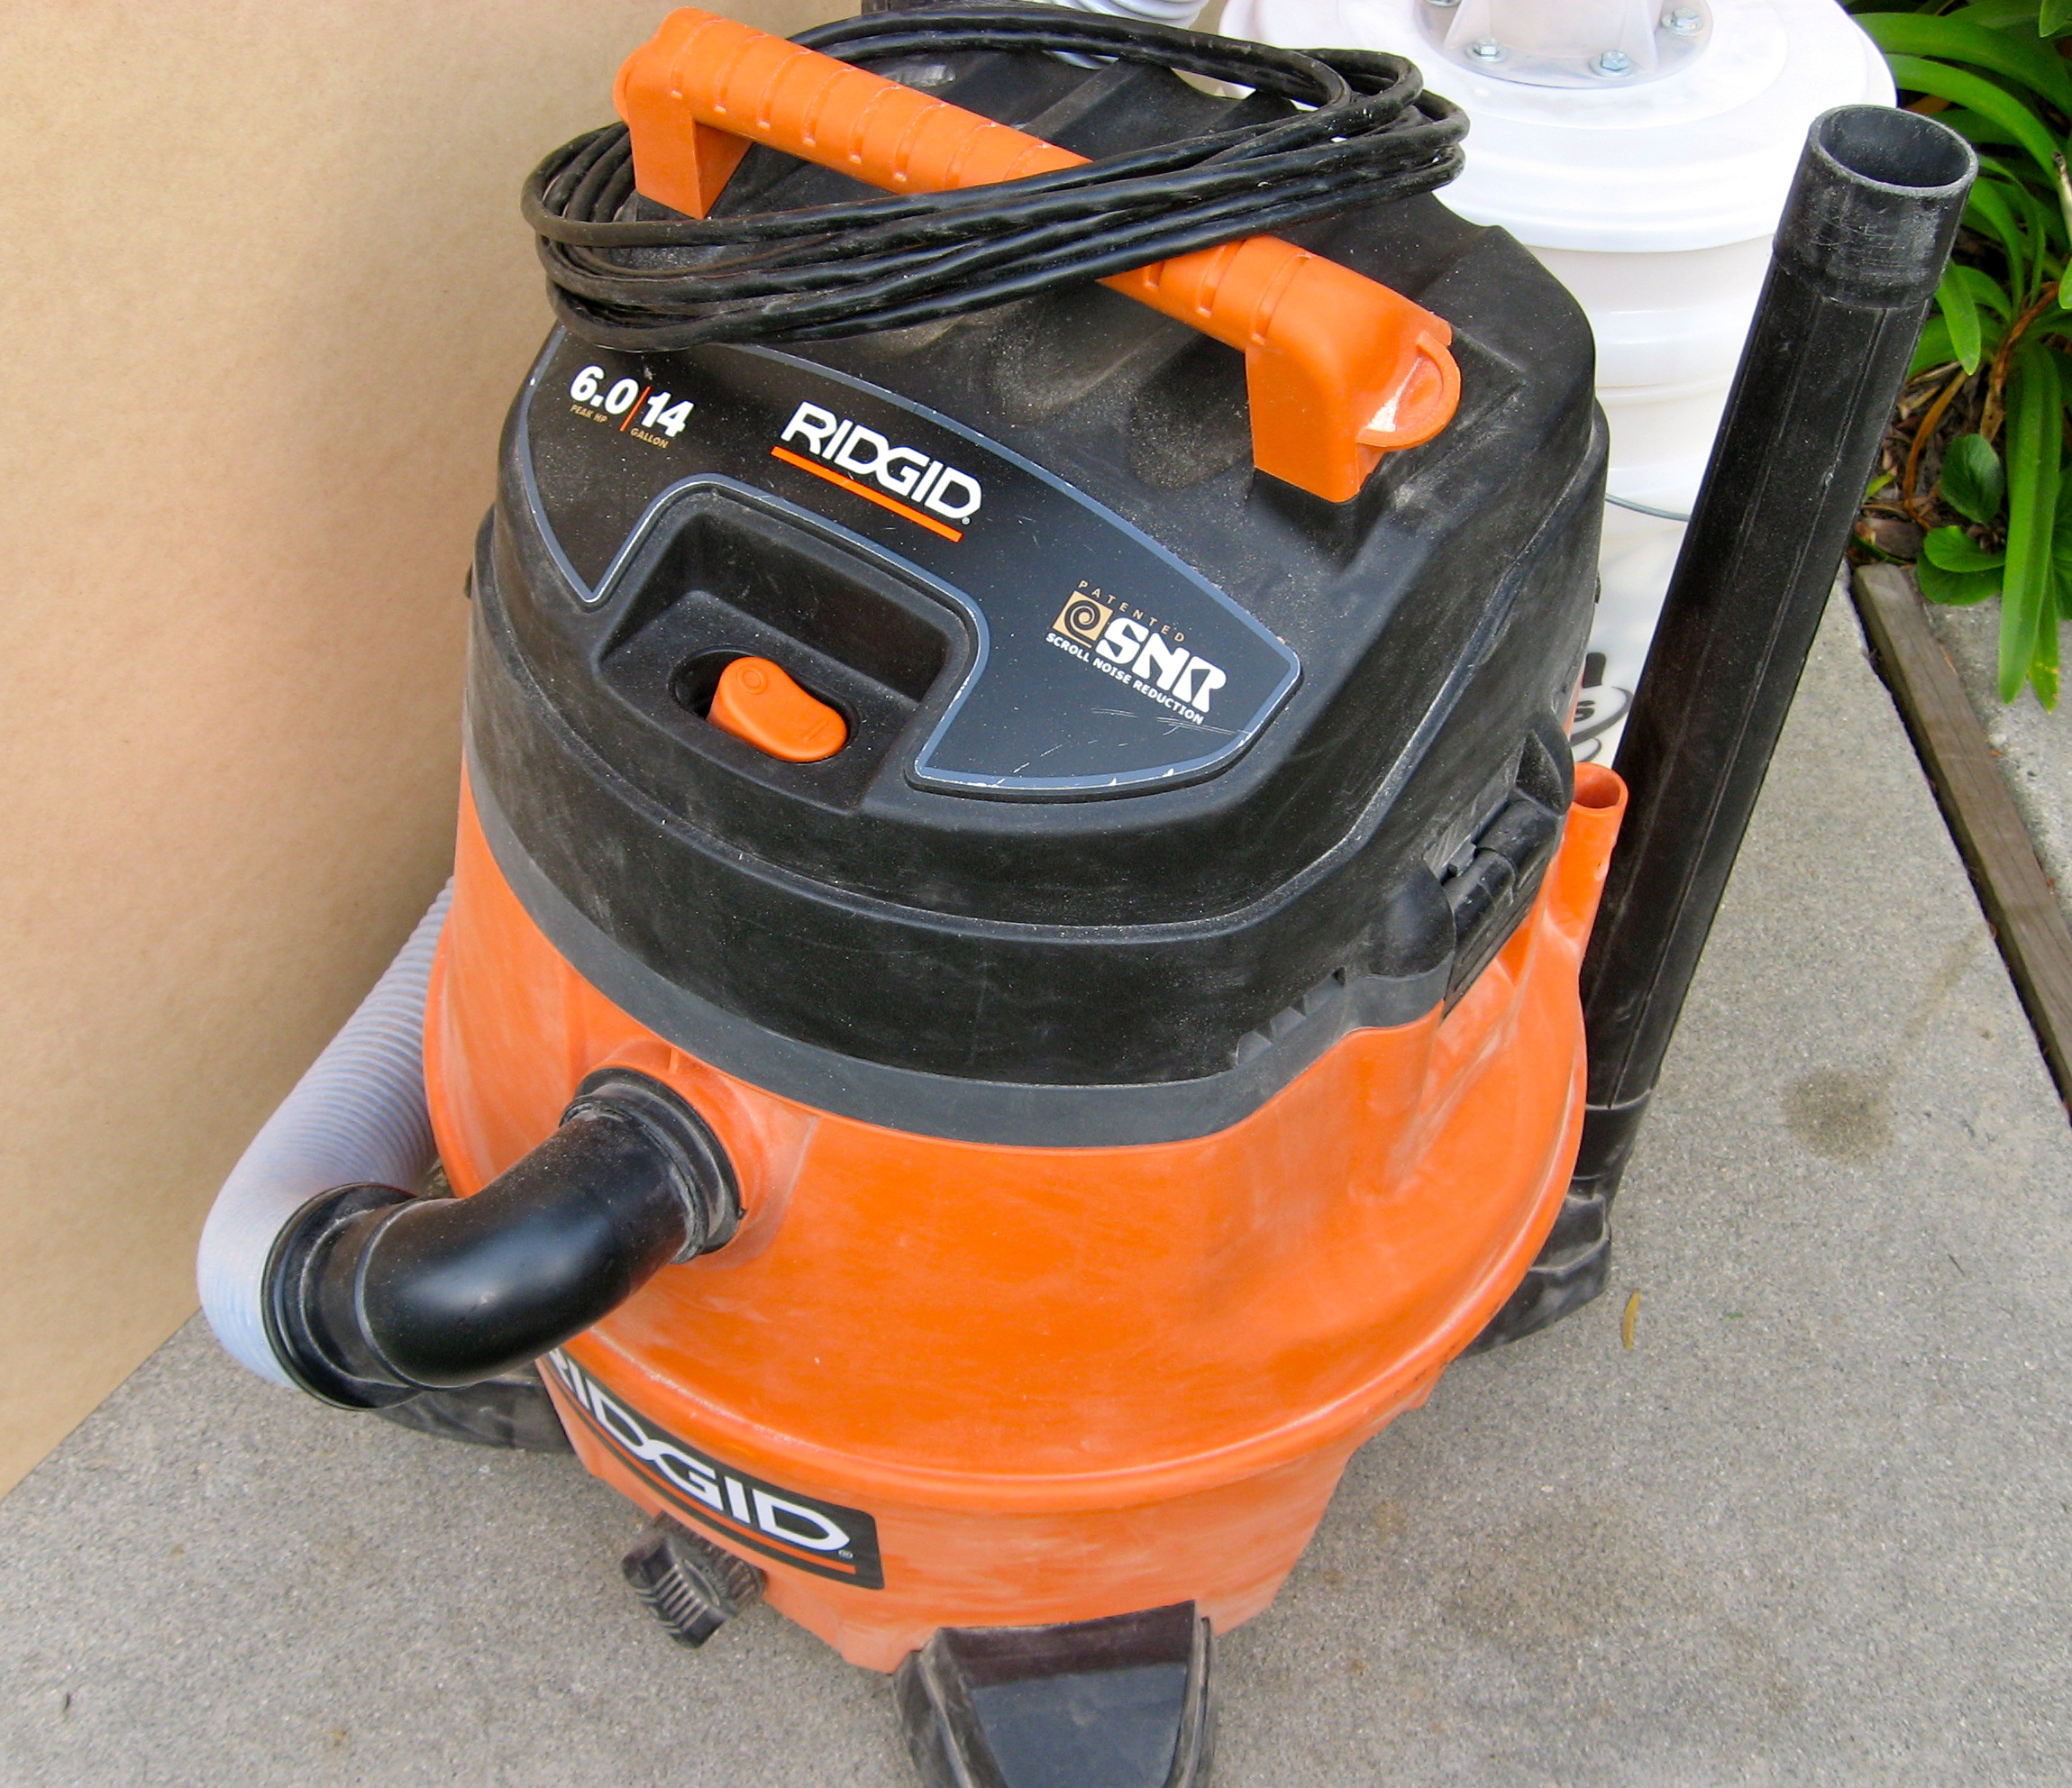
The LintEater comes with an 2 brushes, a cutter tip for rain gutter use, 4- 3′ flexible rods and 2 adaptors to fit to a standard 4″ dryer vent.  I used the adaptor to hook my shop vac to the dryer vent while brushing it out. A clean way to do it. No dust in my face. If you don’t have a shop vac, you could turn on the dryer to air dry and clean from the outside. A dryer doesn’t blow very hard though. You can see from the pictures the rods are very flexible and when screwed together reach 12 feet. You do need to attach the rods to a power drill to spin the brush. This gives it the great cleaning action. The instructions suggest you wrap some tape around the area where the rods are screwed together. This is to prevent them from unscrewing if you accidentally switch the drill into reverse.

IMG_1475IMG_1473Cleaning Dryer Vent


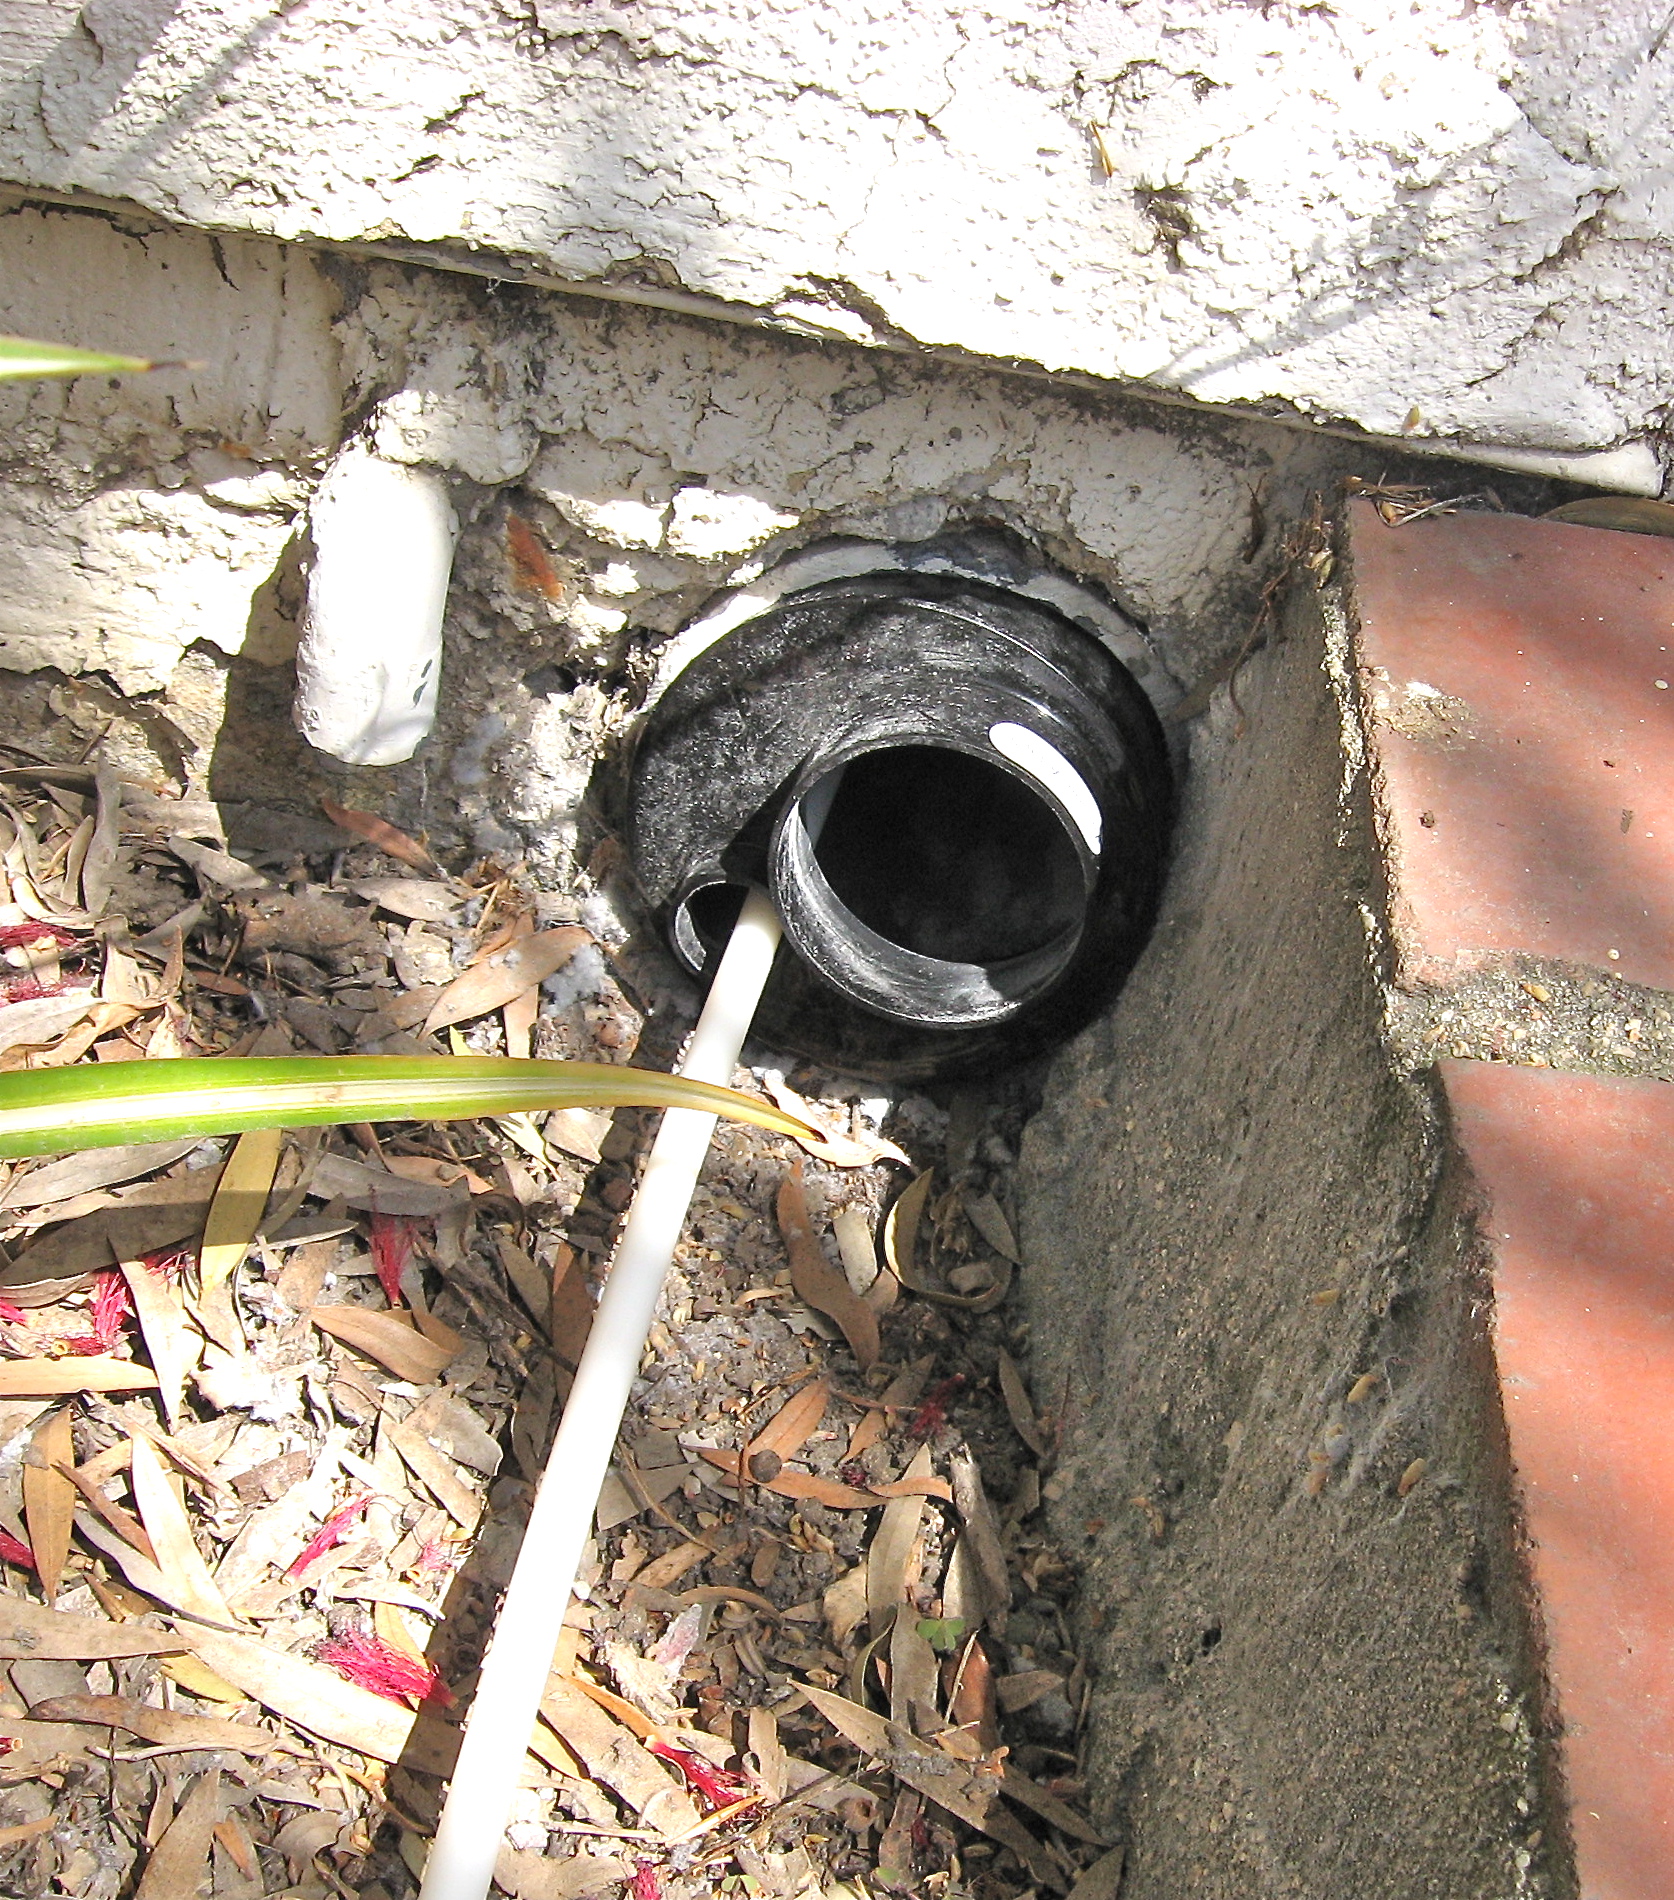
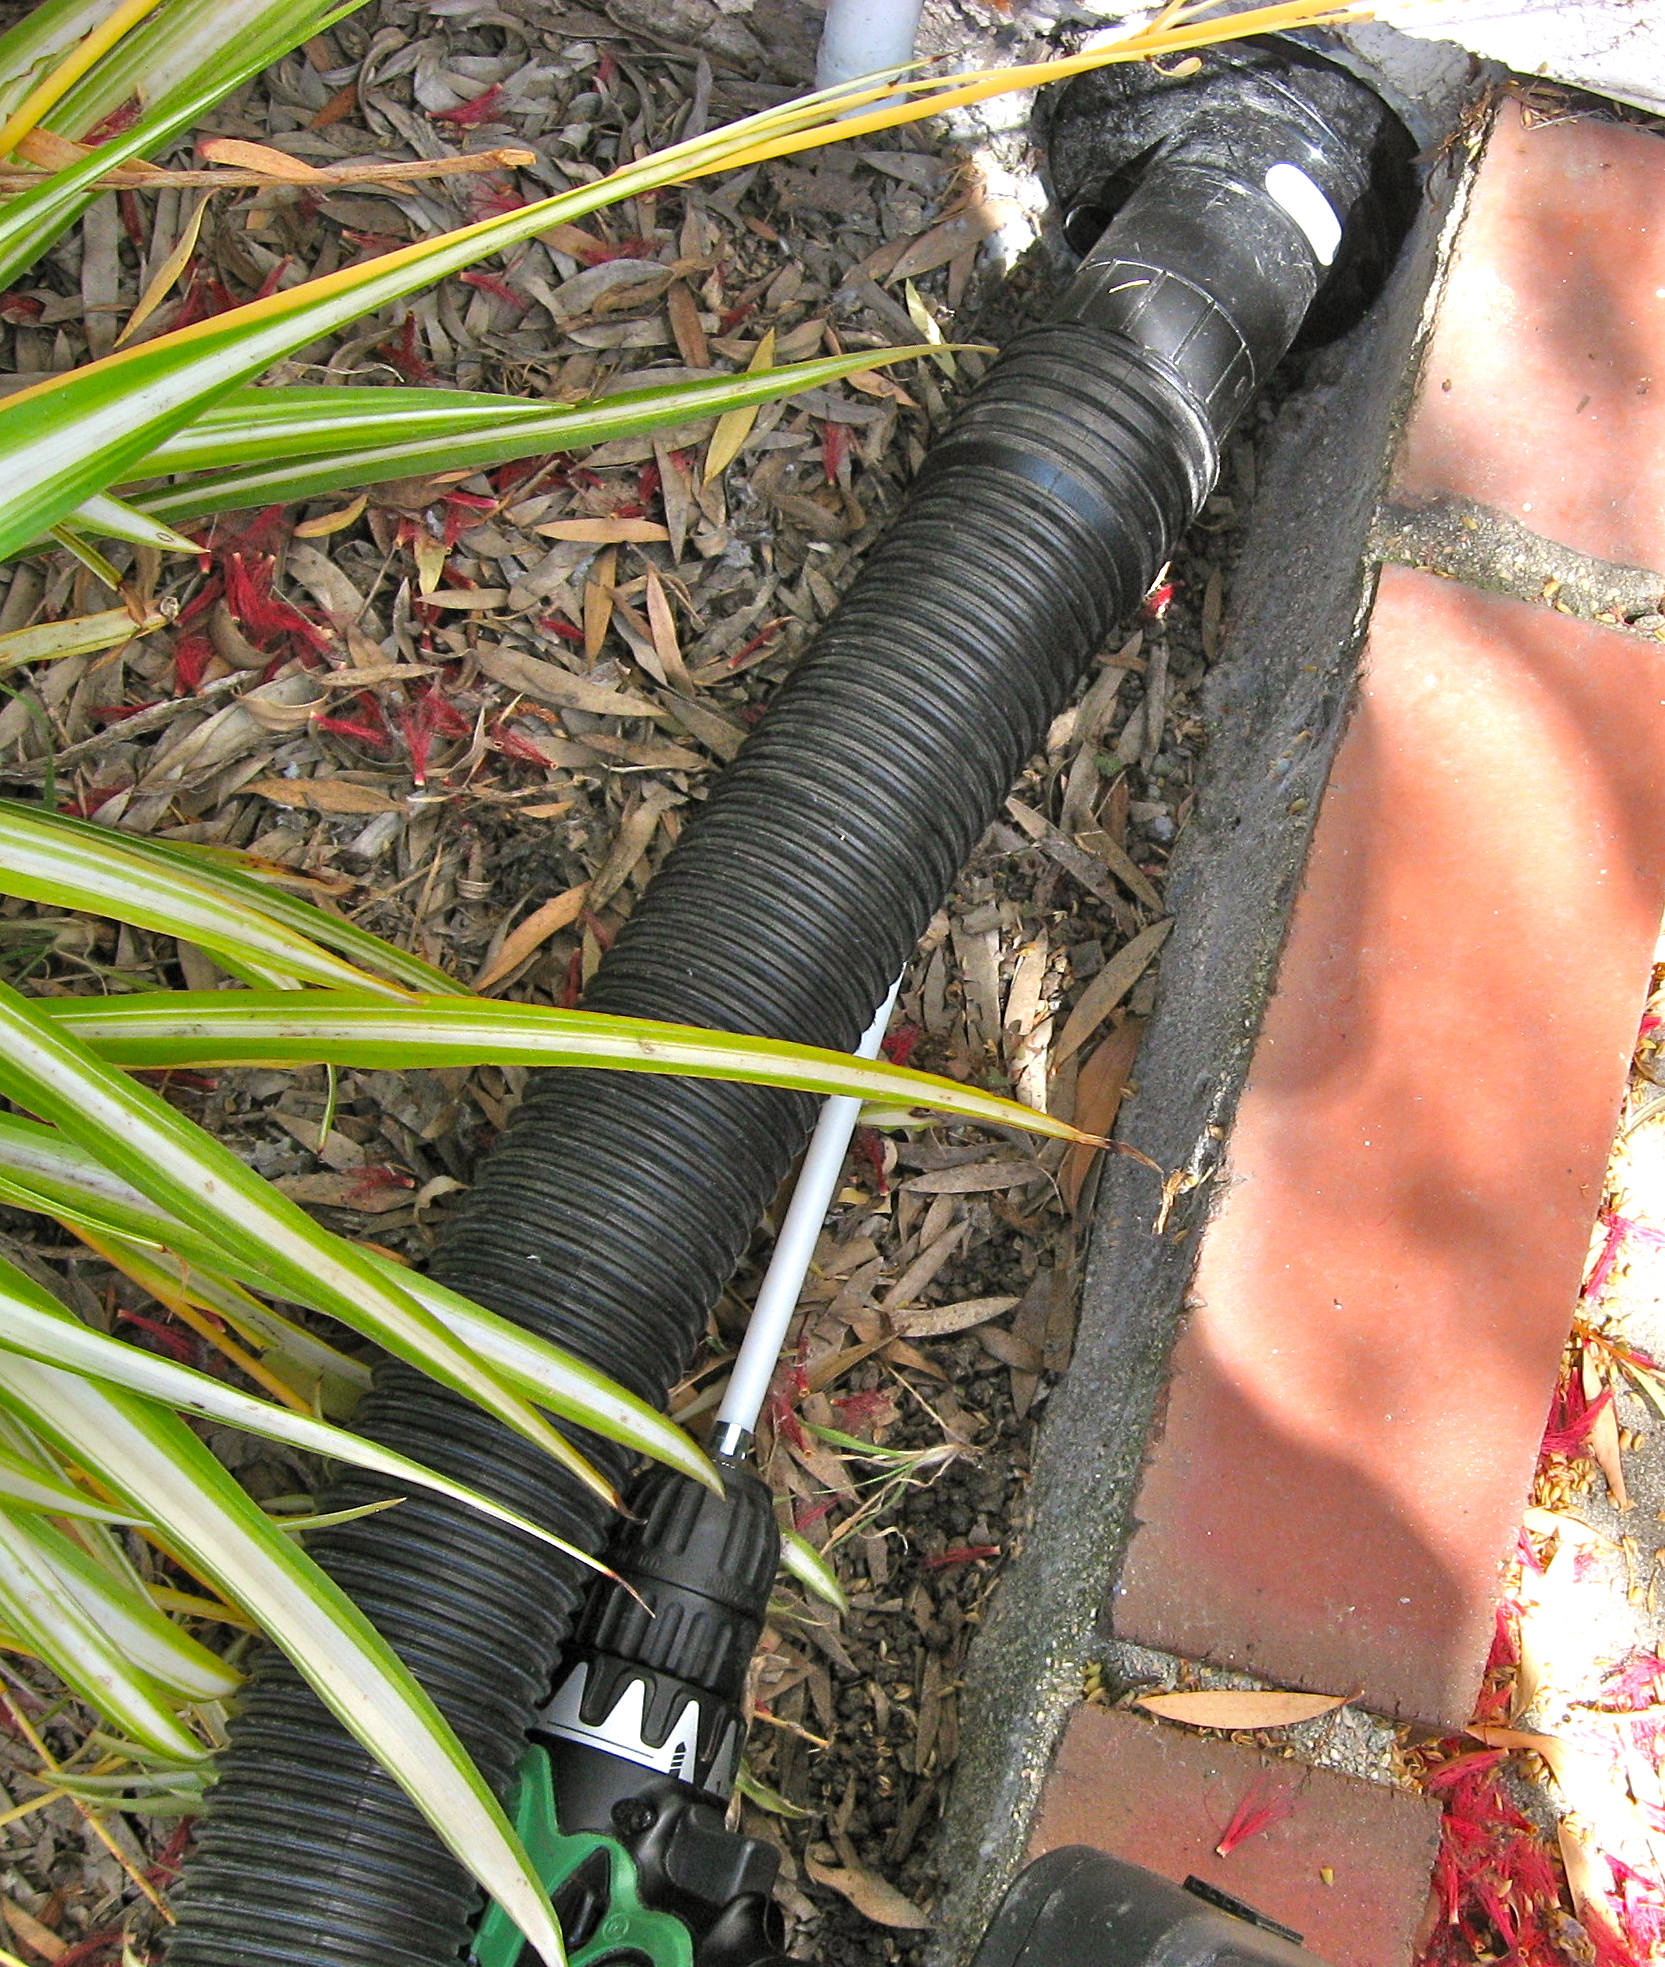
In the pictures above you can see the brush fed through the dryer vent plug, then it is inserted into the vent. This vent was cleaned several months ago so the buildup is not bad. Not like when I first did it!

IMG_1481IMG_1480IMG_1482


I attached my shop vac to the vent and then fed the cleaner, attached to my drill,  into the vent. Since I vent wasn’t too dirty, I did all twelve feet at one time . Feed it in slowly, with a back and forth motion to scrub the vent. The first time I did it, I added one three foot section at a time. Making sure that each section of the vent was clean before adding on another rod. When the vent is caked with lint, it causes friction on the brush. The rods are flexible and want to whip. Adding one rod at a time reduces this.

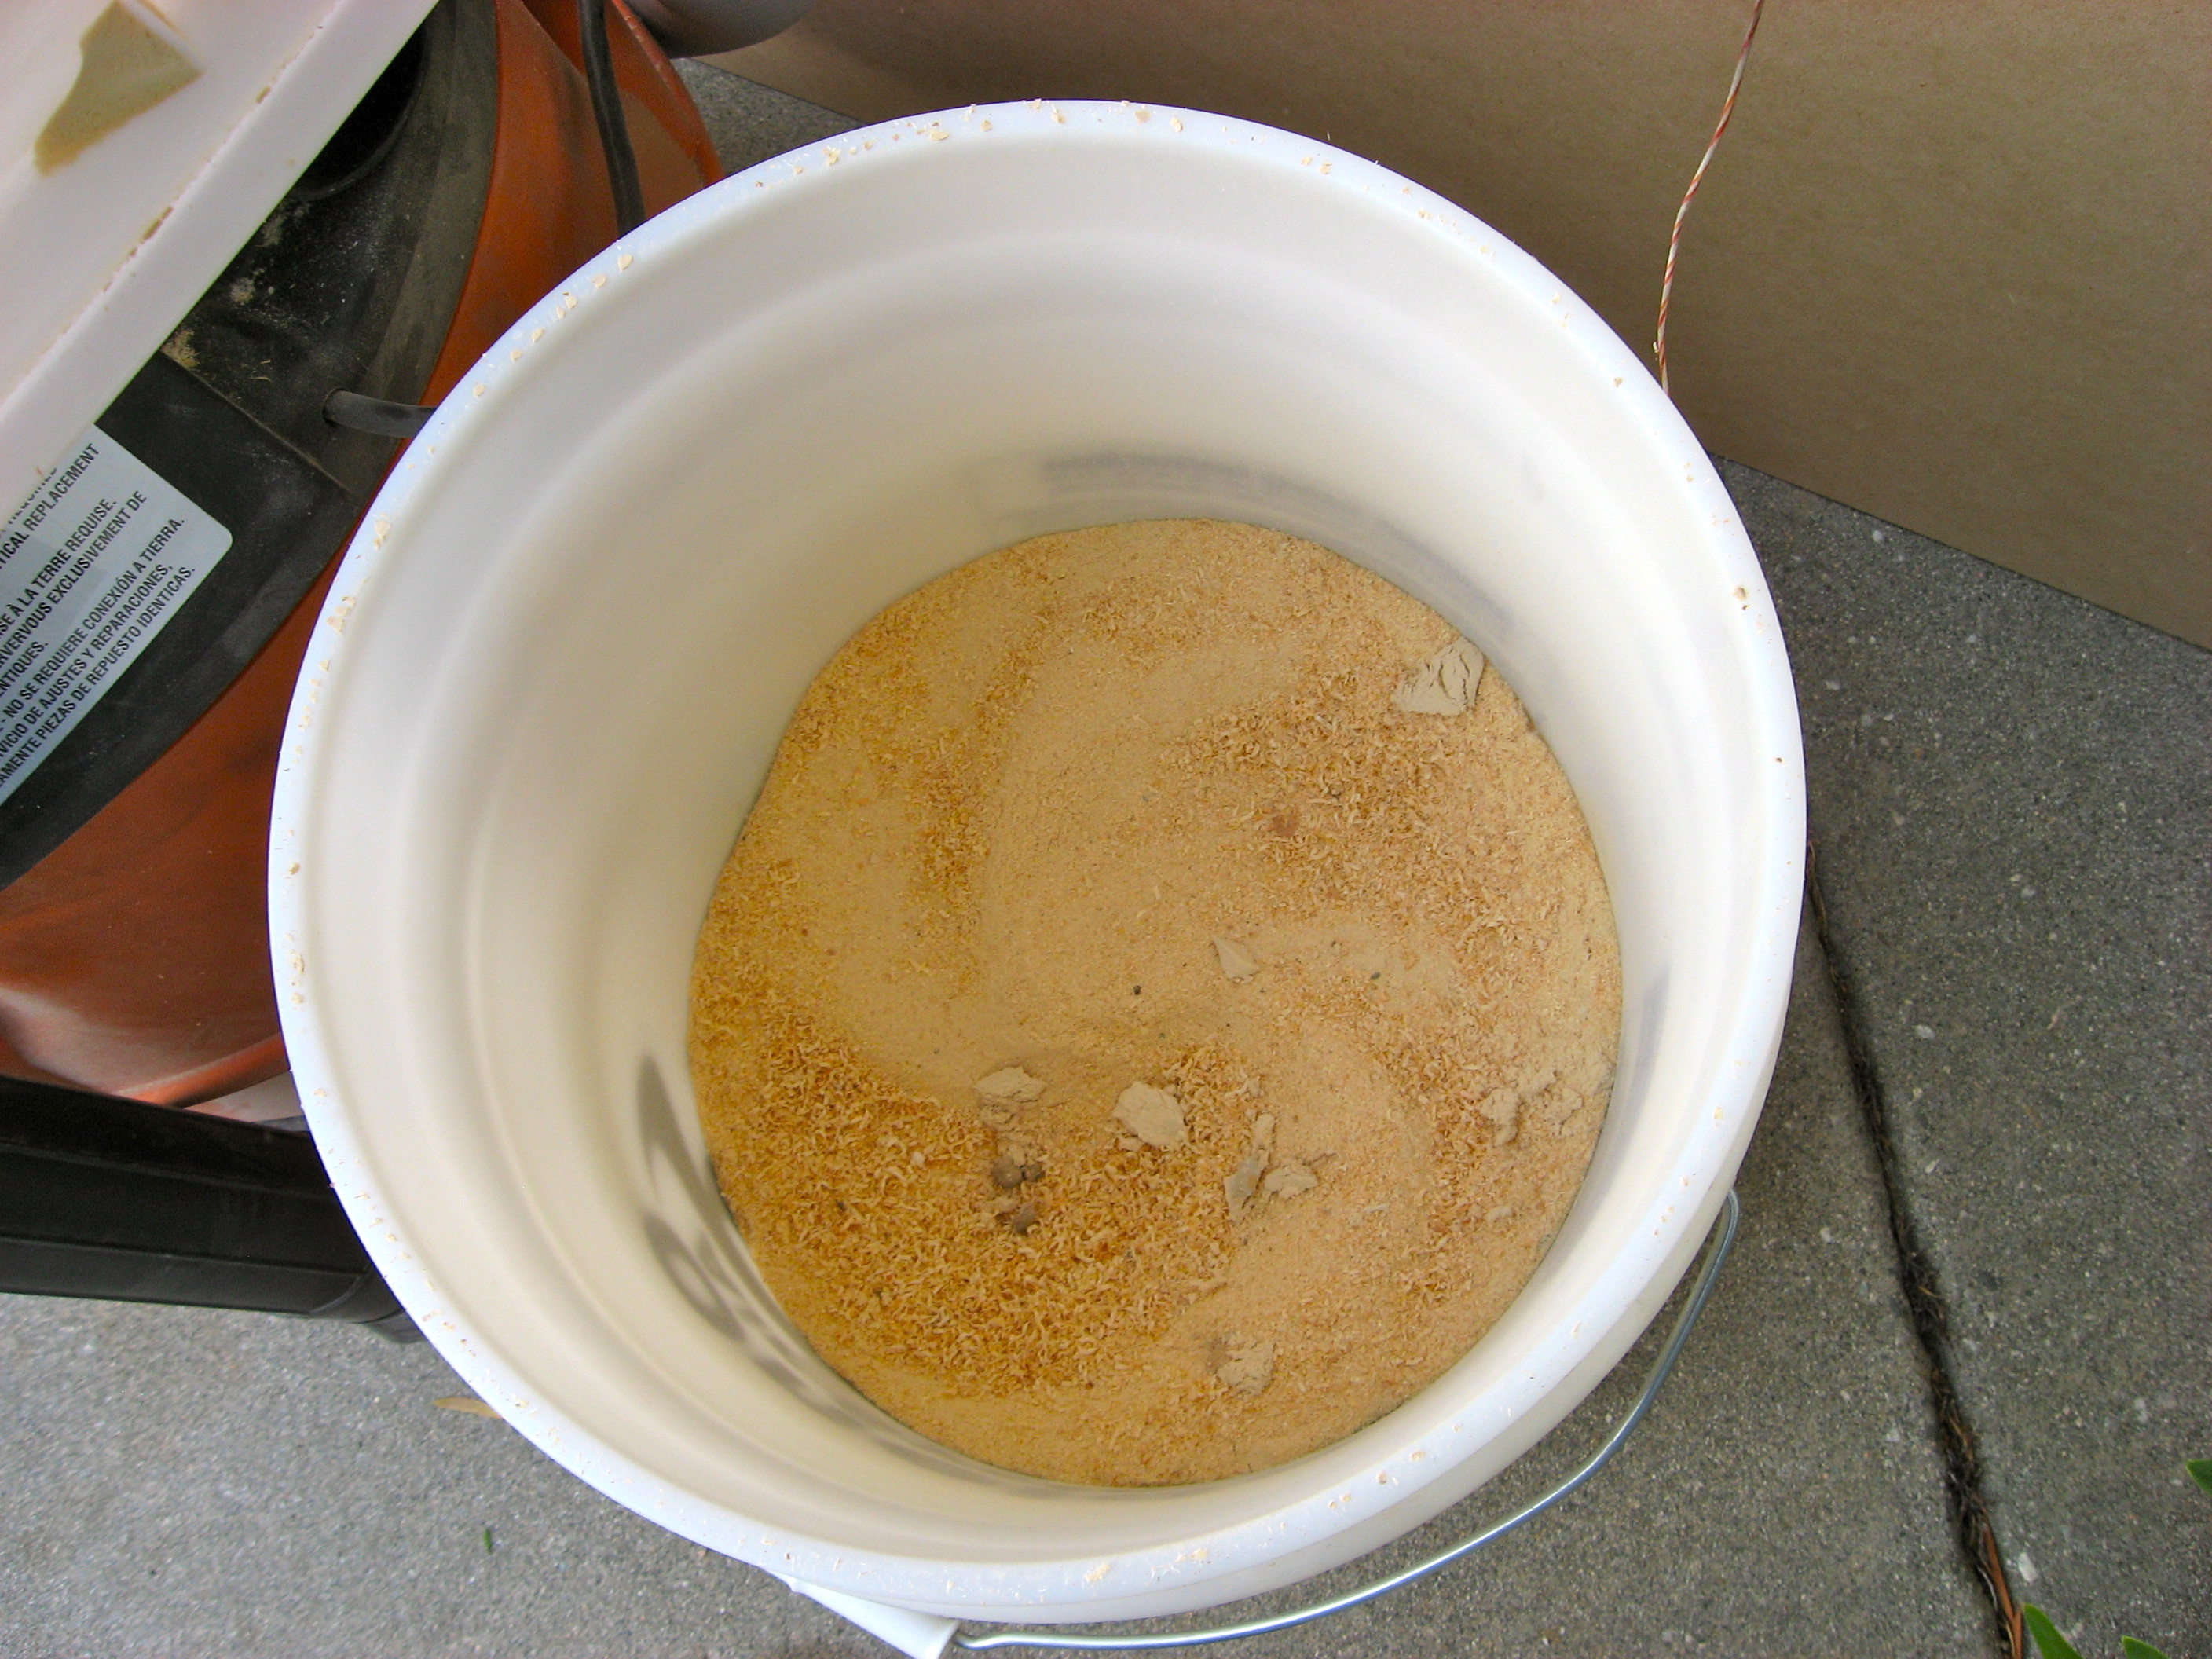
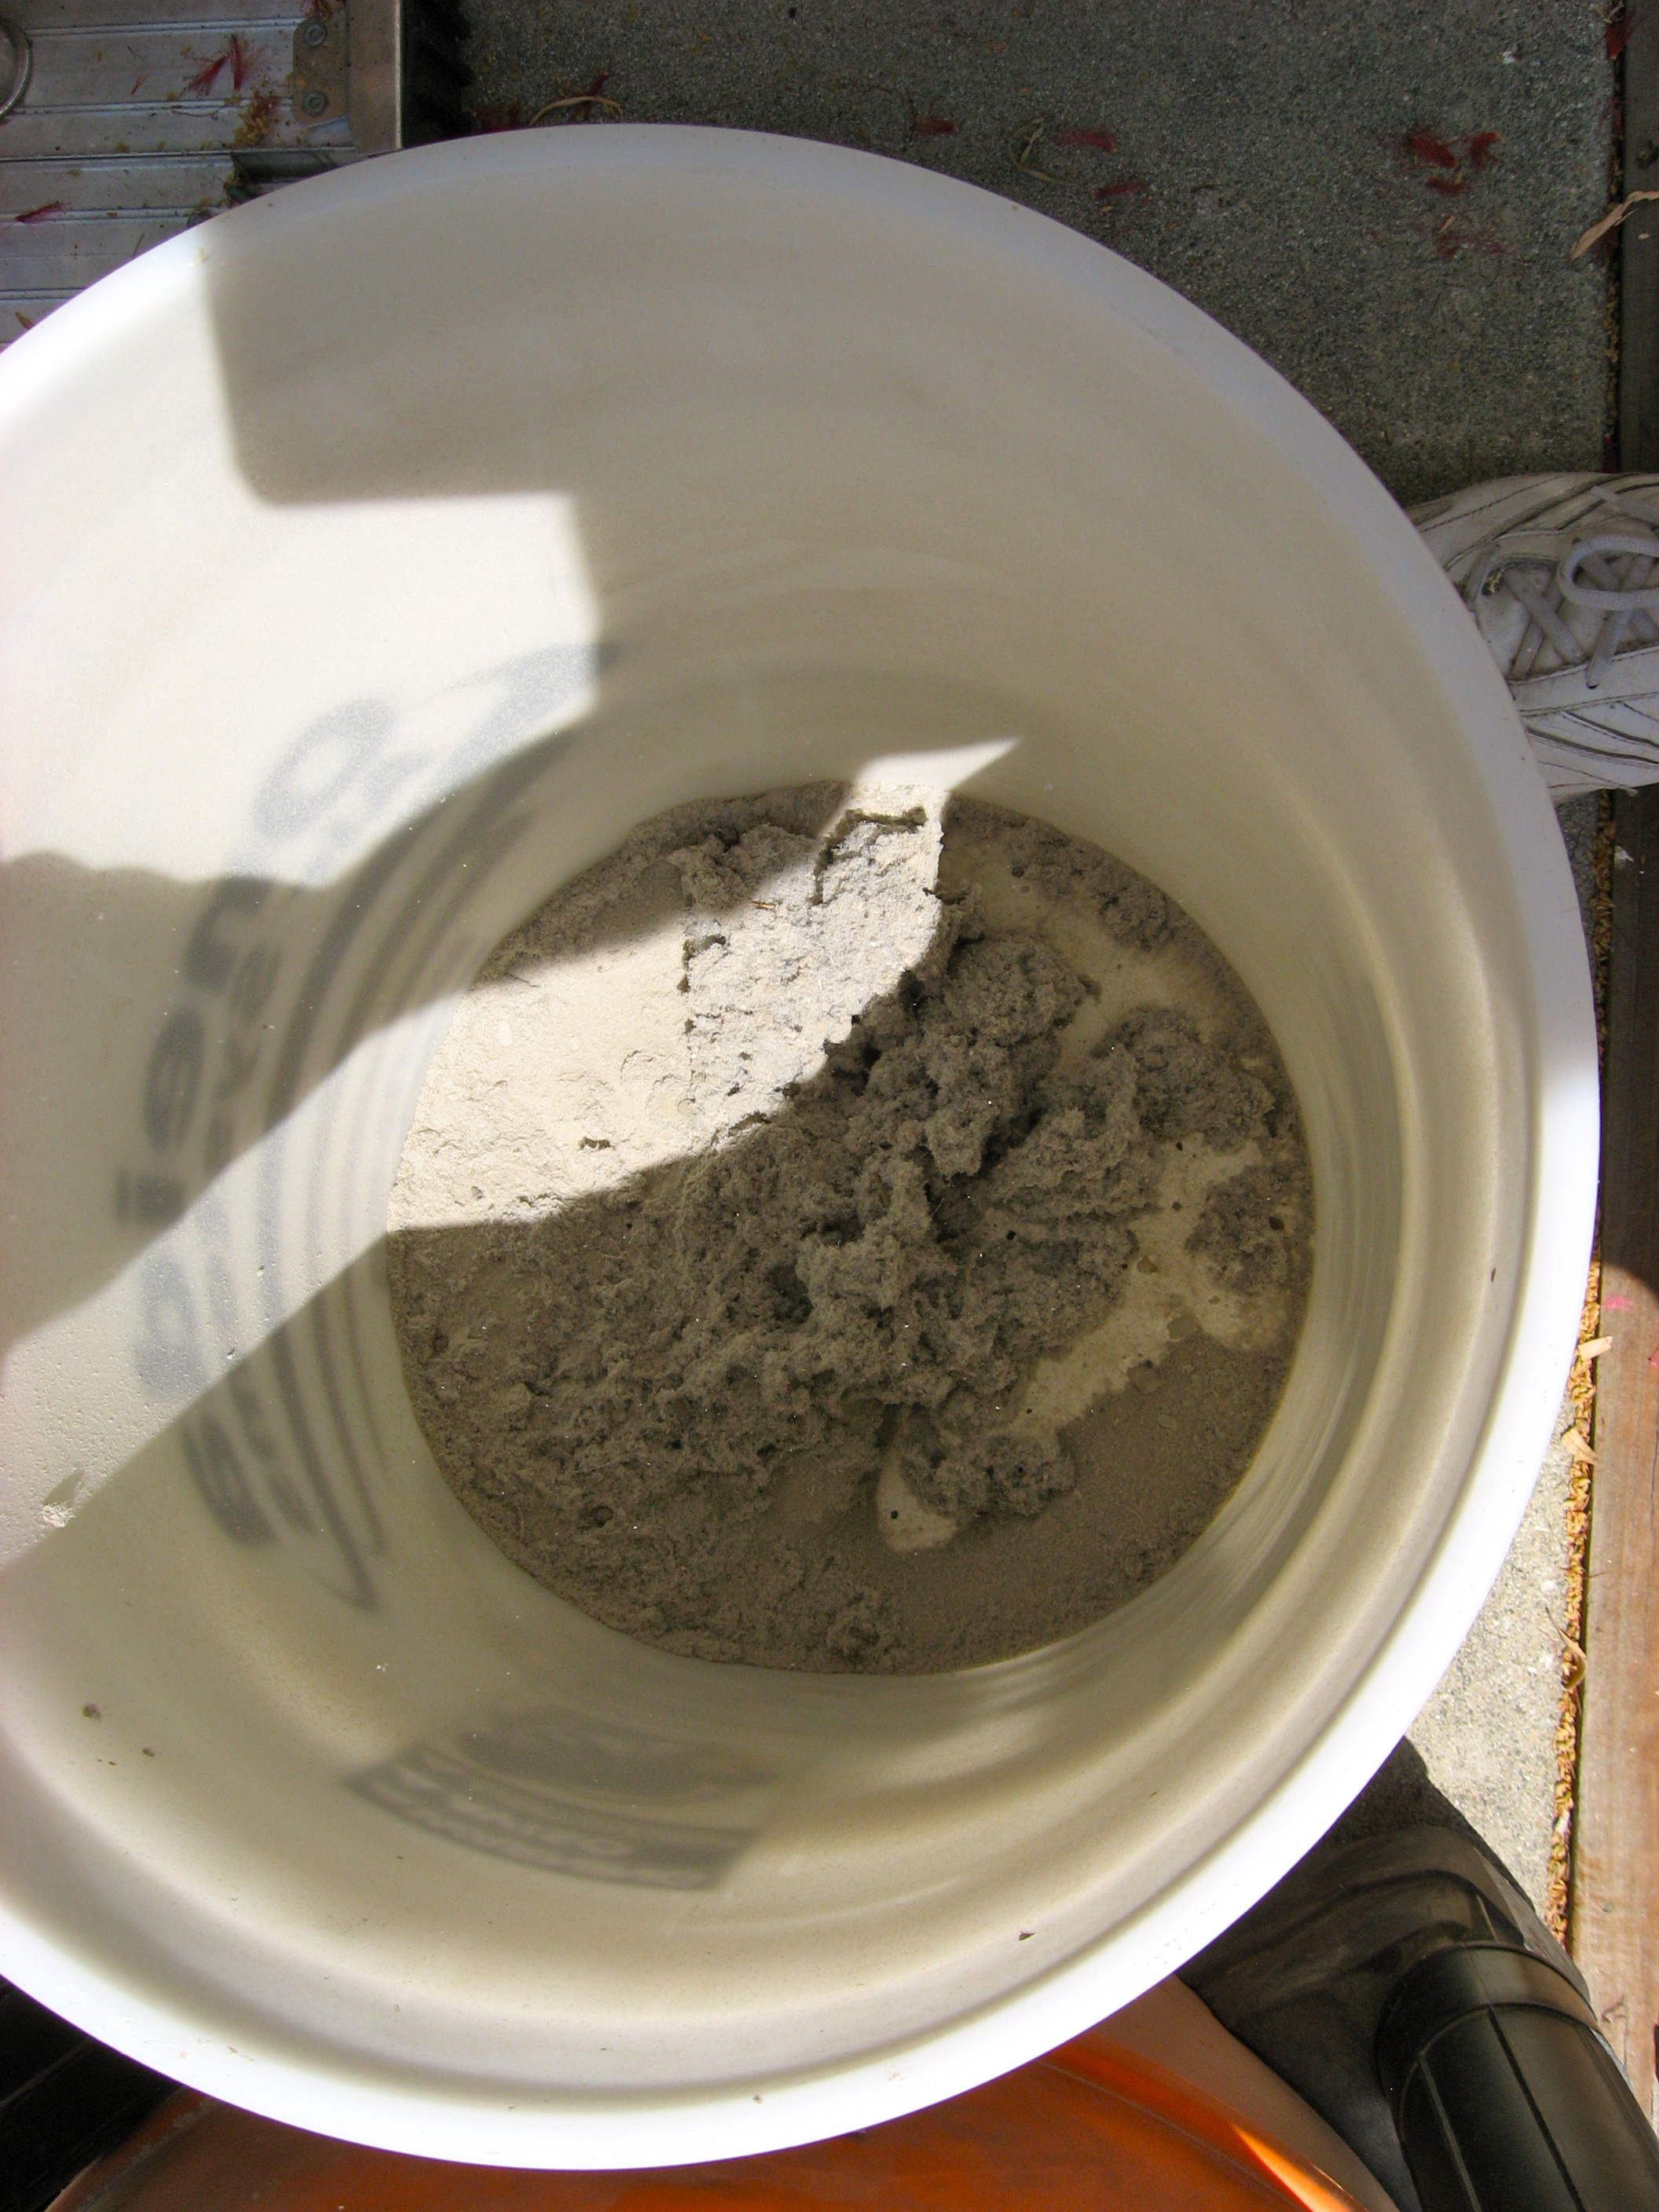
The brush is short so can get around elbows. This is where it really shines for me. At the far end close to the dryer there are 2 elbows. This traps lint. When the cleaner hits that area, I can really hear the lint being sucked into the vacuum. You can see the collected lint in the picture above

After years of my dryer vent being half-way clogged, it is clean. This product makes it easy. Now I clean it whenever I feel the dryer is taking too long to dry clothes. This saves wear and tear on my clothes and energy. As you can tell I am real happy with this product.
Gardus RLE202 LintEater 10-Piece Rotary Dryer Vent Cleaning System


Review Campbell Hausfeld Air Hose Reel

CH Hose Reel

I purchased the Campbell Hausfeld PA500400AV  Retractable Air Hose Reel recently, and am quite pleased with it. This air hose reel review is what I have experienced. It comes with 50 feet of 3/8″ air hose on an enclosed reel. The hose feeds out and retracts smoothly. That is important to me. I have been using a regular hose for years and cursed it every time. Unless you twisted it to get the curl out, it would not lie flat. It was a hassle every time. This hose is a breeze to use. I can pull it out to my driveway. Hold on to the hose when it retracts though!

After using it for some time just sitting by the compressor, I finally mounted it on the wall. It does have a handle on top for portability, but it is better mounted to a wall. It does come with several lag bolts. Remove the bracket from the reel and bolt it down then reattach the reel.

IMG_1468It can swivel side to side. Sticks out from the wall 20″, 15″ tall and 8″ thick. I read an online review that they were concerned it does not have hose guides on the sides, just on the bottom. I don’t think this is a problem as it pivots in the direction being pulled.

IMG_1472I was concerned that it would not be able to provide the volume of air necessary for the impact wrench I use to remove lug nuts on my car. It had to be 3/8″, but I could not find the hose diameter anywhere. Even on the Campbell Hausfeld website.  From the pictures it looked smaller and it was not available in a “brick and mortar” store to look at. So I took a chance and it turned out to be 3/8″. Runs my air tools fine.  You can get it at Amazon  through  this link Air Hose Reel .

After mounting it to the wall I attached it to my compressor through a regulator/moisture filter. In the past I have had problems with the cheap regulators that attach directly to the compressor, so I got a better one, but it didn’t come with a bracket. I made a little holder for it and some accessories with 2 pieces of 1/2″ plywood. Coated it in polyurethane. The regulator just sets in it and seems stable since there is no stress on it.

So after getting everything mounted I am quite happy with my setup and no more cursing. At least at the hose.

air accessories


air accessories 2

How to Build a Funny Bird House

Miesel Creature Birdhouse

I bought these plans from Meisel and thought I would review building this funny birdhouse. My bird house is called “City Beatnik” and there are two different plans included for $15. They have many “old man” type plans. Even more animals. These are full size drawings.  Here is a book by the same designer on Amazon, but they are not full size drawings except for the smaller parts.

IMG_1401
Plans Funny Face Birdhouse
IMG_1403

I found the full size plans useful and they include a cutting guide to get the most from your wood. It can be cut from a 1″x 10″x 8′ piece of pine or cedar. I used rough-cut reclaimed lumber, which caused me a bunch of headaches, because it was cupped. I did like the rough surface.

Let me first say  I use power tools that I have acquired over the years. I understand that many do not have the room or money for these. I think this birdhouse can be built using a jigsaw. With it use a straight edge and a protractor to set the angle of the blade for the bevel cuts. Sandpaper, glue, nails and a way to bore the 1 1/4″ hole and you are set. It would great to build with a kid . I still remember building a birdhouse with my grandfather and that was long ago.

I started by cutting all my pieces to the correct length. Using a crosscut sled I made for my table saw made this easier. Remember to cut to the waste side. Then cut to width. Theses are your blanks to cut the required angles and bevels on. I used my miter gauge to cut the angles for the end pieces. I actually cut the first end, then traced it on the second blank, cut it on the band saw to save time. Since I made mine out of reclaimed lumber and had to glue two pieces together to get the width, I needed to keep the seam centered so it looked right. This made it more difficult.

IMG_1407
Cutting Birdhouse Roof
IMG_1408

To cut the bevels on the sides, I set the bevel on my saw and used the sliding mitre gauge with an extended wood fence to get the piece close to the gauge while keeping my hand far away. Since the piece was already the correct length, I gradually cut the bevel with repeated passes until the bevel was completed.IMG_1431IMG_1429

IMG_1433

I found it easiest to work directly off the main drawing. I got a bit confused how they     measured the angles, so I just used a protractor to measure them.
IMG_1432

Assemble the sides and ends. I used 18 gauge nails and glue. Titebond II is weather resistant. As you can see my sides are cupped. Custom fit the bottom. If you are going to actually use it for birds to live in, then you need to be able to remove the bottom to clean out the old nests. I put a screw in each side to hold it in place. In the picture, the bottom is square, the sides are not. Drill the hole next.

IMG_1438
IMG_1439
IMG_1441

Next comes the part that makes this more than just an ordinary birdhouse–adding the face. I had read about using Glad Press’n Seal to transfer patterns to wood and gave it a try. It worked great! Posted about it here. Using a scroll saw, I cut out the pieces, sanding them smooth on a 1 inch belt sander.

Transferring image with PressnSeal
IMG_1448
IMG_1449

After I had all the parts cut, I rounded the edges slightly. I used a 1/4″ router bit to round over the nose. Looking back, I wish I had rounded it over more. A file and sandpaper can get the same results. Now it is time to attach the face. I had an uneven surface to attach the pieces to. I glued the nostrils and the bottom of the eyes to the nose first. I actually drilled two holes and used screws and glue to attach the nose. I worked from inside the house using a stubby screwdriver. If you have a smooth surface, the screws probably are not necessary. Attach the rest of the parts as in the plans. I didn’t use the ears, because I did not like them.

IMG_1453
Attaching face to bird house

After the glue has set, attach the roof. I found it easier to join the two roof pieces before putting them on the house. Lastly, attach the two acrylic eyeballs. These you have to buy from Meisel when you buy the plans.

IMG_1447
Funny Face Birdhouse

In the end I am pleased with the results. The plans include a second birdhouse. I will make that one too, using new wood, saving me a lot of headaches.

Hope this has been helpful. Please post comments below. Especially if you have built a character birdhouse.

Easy Transfer of Patterns to Wood


IMG_1464This is an easy way to transfer cutting patterns to wood. Instead of using carbon paper, use something you may already have in your house, Glad Press’n Seal plastic wrap. I think this was a reader tip in Wood Magazine. I filed it away in my brain for future use. I used it when building a Funny Birdhouse.

Take a piece of Press’n Seal and smooth it down on to a dust free drawing or picture you want to transfer. Make sure the sticky side is down.  If the print on the film is readable you have it right. Really smooth it down using some pressure so it sticks. Now using a Sharpie, trace the pattern. When you are done peel it off.

Transfer it to the wood. Make sure the wood dust free so the film will stick. Smooth it downIMG_1463 using pressure. Work from the centre out. The film has a texture to it that acts like suction cups. When you have it down, cut off the excess with a razor knife.

Using a scroll saw or band saw cut out the pattern. I haven’t tried a jig saw. The film sticks well, but I don’t know if dragging the base of a jig saw across it would peel it off.

Don’t forget to peel of the film before gluing up. Like I almost did.

IMG_1448Birdhouse


Oneida Dust Deputy Review

Ridgid WD1450 and Oneida Dust Deputy

Ridgid WD1450 and Dust Deputy

Oneida Dust Deputy Review. As mentioned in my previous post on the Home Depot  Ridgid 14 gallon shop vac, it is great except for the filter clogging rapidly. I needed a way to pre-filter the air. I decide upon hooking up an Oneida Dust Deputy to my Ridgid Wet/Dry Vacuum. This dust separator was the solution.

Their are quite a few dust separators on the market, including one that Rockler sells. Kits are also available to make your own. Fortunately, I saw a video by Marc Spagnuolo the   “Wood Whisperer” where he did a comparison of four brands. The Oneida looked like the one for me. I ordered one and it arrived on my doorstep. The Dust Deputy sold on Amazon is basically 2 heavy duty 5 gallon buckets with a cyclone separator on top. The bottom bucket is used if you want to put wheels on it and attach it to your shop vac like I show above. Then you

Oneida Dust Deputy Attached WD1450

Dust Deputy Attached WD1450

slide the top bucket into it. This is for easy removal when you need to empty the dust and chips. Oneida gives you the parts to physically attach it to your vacuum (bolts, foam spacer block, wheels) So it rolls along with your vac. I did not do this right away. Oneida also includes a good quality  hose to hook the cyclone up to the vacuum. If you want to attach it to your vac, cut the foam block to the vacuum’s profile and run the 2 bolts between the bucket and the vac. Yes you have to drill two holes in your vac.

How good does it work? It works great! I emptied my vacuum and attached the Dust Deputy. After vacuuming up a bunch of sawdust and chips, there was just the tiniest bit in the shop vac. Like a teaspoon full if that. Good news for me, I could then install filter bags since they would not fill up quickly. Now the suction remains constantly strong. I move the unit to the power tool I am using, but usually have it hooked up to my table saw. I also use it to clean up the shop.

The unit does build up a static charge. Oneida gives you some copper tabe to attach to the cyclone to dissipate it. You then attach a wire to a washer that drags on the ground to “ground out” the charge. I did get a good jolt one time, though not exactly sure how. Regardless, I am very happy with this product and would buy it again.

Oneida Dust Deputy Dust collection bucket

Dust Deputy Dust collection

Ridgid WD1450 Wet/Dry Vac Review

Ridgid WD1450


This is my review of the Ridgid WD1450 wet/dry vacuum. I was tired of the dust coming from all my power tools and flying all over the garage. I did not want to pay for a shop dust collection system, so I decided to get a good shop vac and see what it could do. I settled on one from Home Depot after reading many reviews. The Ridgid WD1450 is about $100 and gets you a well built, 14 gallon, relatively quite, powerful wet/dry vacuum. It comes with a hose, 2 wands, a surface cleaner attachment, and a bag that carries attachments on the vac. There are many additional attachments available at Home Depot. I like that it comes with a long power cord. I have been happy with all  the Ridgid products I have purchased.

This thing is powerful. Keep small children and pets away when using! OK that is a joke, but it is strong. I needed a lot of suction because I wanted to use it on shop tools like a table saw. It does the job with my table saw. It doesn’t get all the dust, because my saw isn’t designed for efficient dust collection, but it really helps keep the small stuff out of the air. I think it is a real bargain for the price.

The one complaint I have with it, is the suction is so strong, it lifts most of the collected dust into the pleated filter instead of leaving it on the bottom of the vac chamber. This clogs the filter quickly cutting down on the suction. I hate cleaning filters and I had to do it often. Home Depot does sell bags to use with this vac. They work well and the suction doesn’t fall as quickly with them. With as much saw dust that I collect, this can get expensive real quick. So I found a solution I will share in my next post. Dust Deputy

Ridgid WD1450 Filter Bags

Ridgid WD1450 Pleated Filter and Filter Bags

Bathtub Caulking the Best Way

I find this is the best way to caulk a bathtub. No one likes to re-caulk a bathtub, but it is a necessary evil. If it isn’t done- it looks terrible. Even worse, water will get behind the tile and damage the wood underneath. The best way is to remove the old, mildewed and loose caulk. By removing the old caulk and replacing with new, you will have a long lasting repair. If you just go over the old, the mildew will just transfer to the new and there will not be a good bond.

Caulk Removal Tools

Caulk Removal Tools

The goal is to have an elastic seal between the tub and the wall. When the tub is filled with water, it actually moves down slightly from the wall. Each gallon of water weighs eight pounds plus a person- it adds up. That is why the caulk has to flex or it will crack. As in painting, preparation is the key. You have to remove as much as possible of the old caulk. Here are the tools I use. Feel free to improvise. I use the razor blade to scrape and cut, the screwdriver and pick to get under and lift, the long nose pliers to pull strips of caulk off. It is great when you can work loose a section of old caulk and it comes off in a long strand. Unfortunately, that seldom happens for me.

Here is a tool I find useful. It is an oscillating multifunction tool. You can get them cheap at

Oscillating Multifunction Tool

Oscillating Multifunction Tool

Harbor Freight or Amazon. Genesis GMT15A Multi-Purpose Oscillating Tool
They sell them cheap, because they get you on the attachments. The saw blade I use comes with the tool. A simple steel saw. You don’t need carbide, because we are not removing hard grout. I use a thin steel sheet to protect the tubs porcelain if I slip. When using any of the tools, take care not to scratch the tub or wall. You have to be very careful if you have a fiberglass tub or wall.

After you have removed all the old caulk, use a vacuum to get all the loose bits. Here are Bathtub caulk removedthe two grouts that are most popular at Home Depot. I have been having a tough time with the Kwik Seal mildewing after a year (really annoying). I have started using the GE white silicone for better mildew resistance. You can also get it in a big tube to use with a caulking gun.

Bathtub Caulks

Caulks

Before applying the caulk, have a bunch of paper towels handy and a small bowl with soapy water in it. Apply a bead of caulk. The thickness of the bead takes practice. Too little and you won’t fill the gap. Too much and you will have a lot to clean up. So do a little section first. Take your finger, dip it in the soapy water, and smooth the bead of caulk down so it blends into the wall and the tub with a dished look. Remove excess caulk with your finger. You want a nice seal. Wipe the excess off of your finger with the paper towels. Do another section. You can blend one section into another with your finger. Keep on going. Dipping your finger in the soapy water keeps the caulk from sticking to your finger, giving a smooth finish. Once you are done, stand back and look at the difference it makes! Follow the directions on the caulk for drying times.

Applying Caulk Bead

Caulk Bead (Click to Enlarge)

Smoothing Bathtub Caulk Bead

Smooth (Click to Enlarge)


Bathtub Caulking Finished

All Done!